







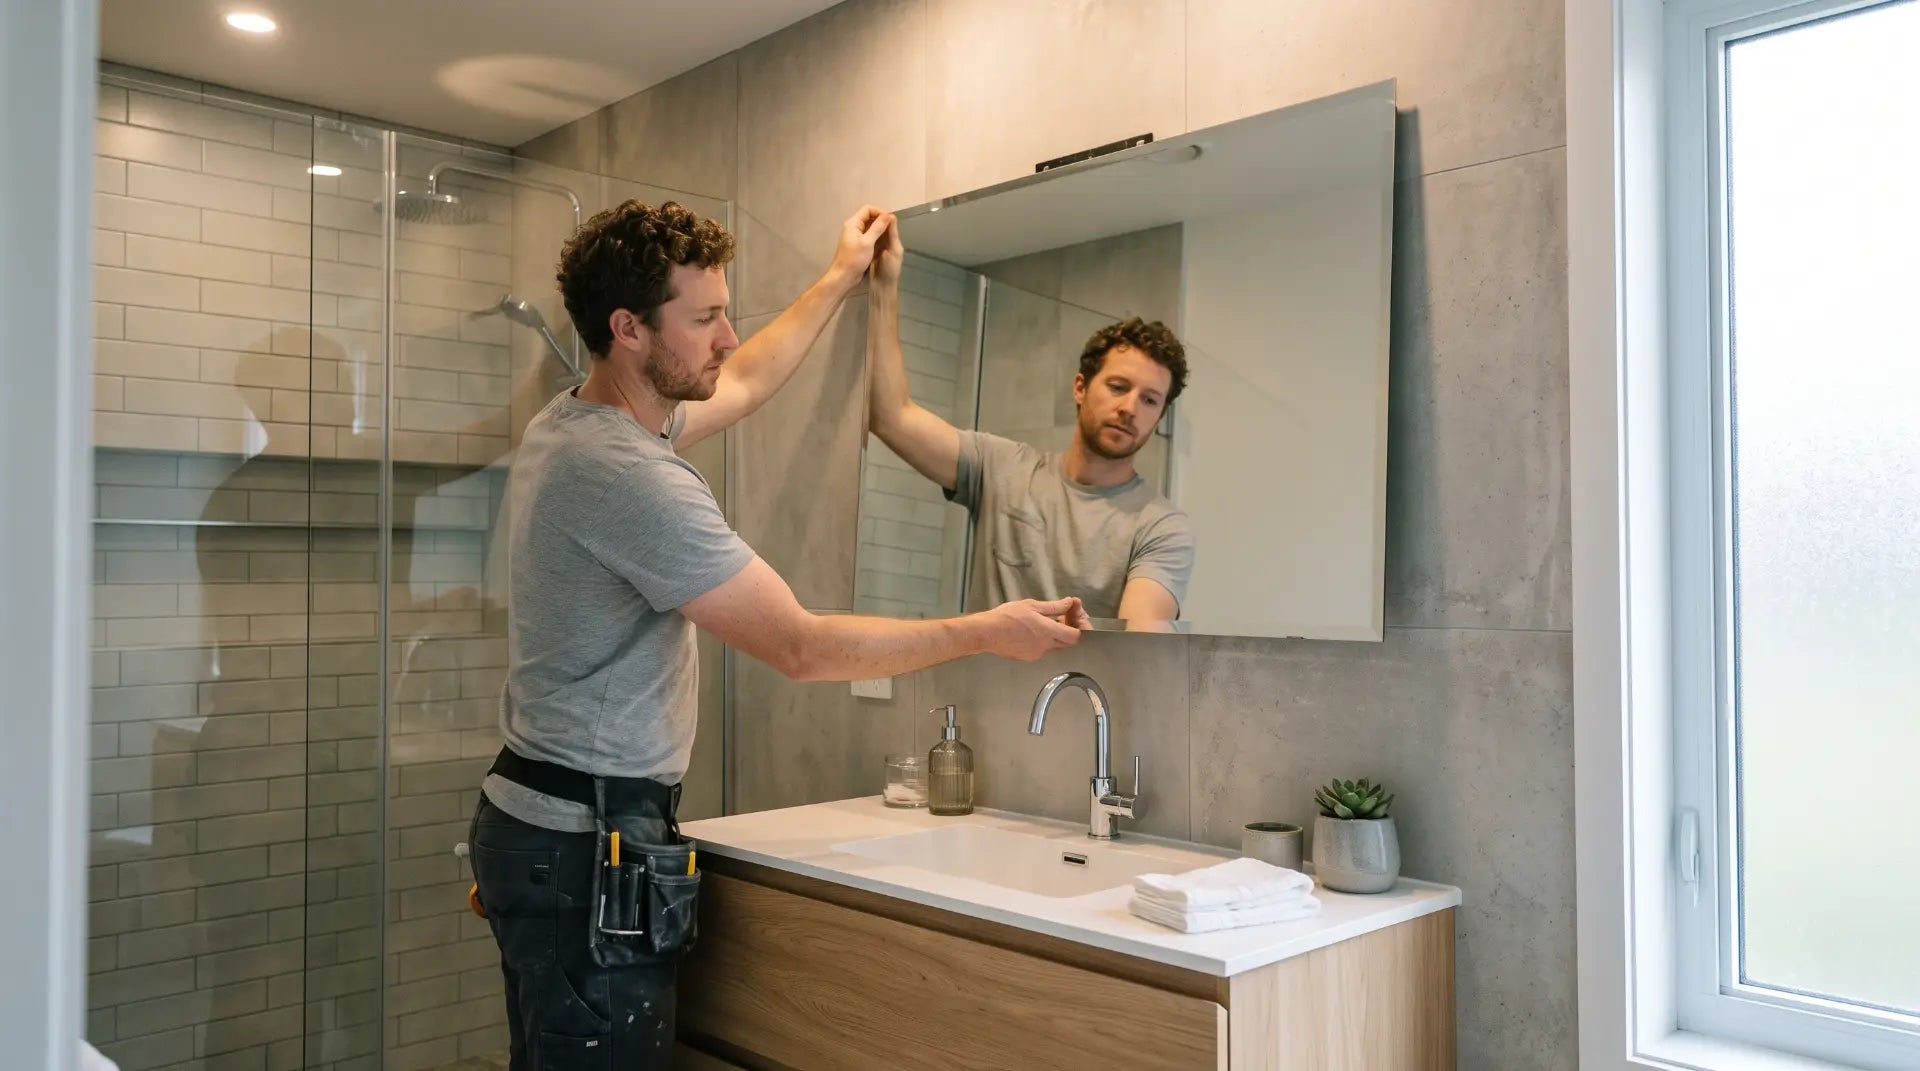
Keyhole brackets, French cleats, adhesive, J-clips, and LED mirror hardwire - every installation method covered with exact steps, the tools you need, and the mistakes that cause mirrors to fall.
The single most important pre-installation step is reading the installation instructions that come with your specific mirror. Every mirror's mounting system is determined at manufacture - the bracket type, mounting hole spacing, weight, and required anchor type are fixed specifications that the installation must follow. Improvising a mounting method that doesn't match what the mirror was designed for is the leading cause of failed bathroom mirror installations in US homes.
The three things to confirm before you buy any hardware or put a hole in the wall: the mirror's weight (in lbs, from the spec sheet or product listing), the mounting system it uses (keyhole bracket, French cleat, J-clip, adhesive, or LED hardwire), and the mounting hole or cleat spacing dimensions. All of this information should be in the box and on the Bathify product page for the specific mirror you purchased. If any of it is missing, contact Bathify customer support before installing.
James Martin framed mirrors (Addison, Bristol, Brittany, Boston): keyhole bracket system with recessed hardware - see Method A. Vanity Art Align, Alder, Lumi, Brisa, Mira LED mirrors: wall-mount with included hardware, vertical or horizontal - see Method A or D depending on weight and wall. ICO Bath Camden and Eden dual-lit mirrors: wall-mount with hardwire or plug-in electrical - see Method E. A quick reference table is at the end of this guide.
Most bathroom mirror installations require only basic tools. Gather everything before starting - a mid-installation trip to the hardware store is the most common reason an easy project turns into an hour-long delay.
For LED mirror hardwire installation, additionally: voltage tester, wire stripper, wire nuts or push-in connectors, and the mirror's wiring diagram from the instruction manual. Circuit breaker must be off before any electrical connection.
Getting the height right before any holes are drilled is the step that most DIY guides rush through and most homeowners regret skipping. The standard bathroom mirror installation height places the mirror's center at 57-65 inches from the finished floor, which positions the mirror center approximately at eye level for a typical adult. For most US bathrooms with 8-foot ceilings and standard vanity heights, this produces the correct proportion. For bathrooms used primarily by children or those with mobility considerations, adjust downward.
Measure 60 inches from the finished floor and mark that point on the wall with a pencil - this is your starting target for mirror center. Adjust slightly up or down based on the height of the primary users, but stay within 57-65 inches for correct proportion relative to standard vanity height (32-36 inches) and typical ceiling height.
The bottom edge of the mirror should clear the top of the vanity backsplash or the highest point of the faucet handles by at least 4-6 inches. If 4-6 inches of clearance and a mirror center at 60 inches don't both work given your mirror height, prioritize the faucet clearance - a mirror that overlaps the faucet zone looks wrong and makes faucet use awkward.
The top of the mirror should sit 2-3 inches below any overhead vanity bar light or ceiling-mounted fixture, whichever is closer. For a bathroom with a bar light already installed, mark the bottom of that fixture on the wall, then measure 2-3 inches down to find the mirror's maximum top edge position. Work backward from that to find where the mirror center should sit for your specific mirror height.
Find the horizontal center of the vanity below and mark it on the wall with a vertical pencil line. The mirror's center should align with the vanity's center. For a double-sink vanity with two mirrors, center each mirror over each sink. Use painter's tape to mark the mirror's full outline on the wall before drilling - this lets you step back and visually confirm the position and proportion before committing.
Tape first, drill second. After marking the center and outline, cut strips of painter's tape to match the mirror's exact dimensions and stick them to the wall in the target position. Step back to the bathroom doorway and look at the full composition - mirror size, height, and relation to the vanity below. This takes two minutes and prevents the most common proportion mistake: a mirror that looks fine when you're standing next to the wall but wrong when viewed from the normal bathroom entry distance.
US residential wall framing is typically 16 inches on center - studs spaced 16 inches apart. If the mirror's mounting points happen to align with stud locations, use 2-inch or longer wood screws directly into the studs for the most secure possible installation. If the mounting points fall between studs (the more common scenario), a drywall anchor rated for the mirror's weight is required. The anchor choice is critical - using the wrong type for the mirror weight is the leading cause of bathroom mirror falls.
| Anchor Type | Weight Rating (per anchor) | Best For | Notes |
|---|---|---|---|
| Standard plastic expansion anchor | 5-15 lbs | Light décor only | Not suitable for mirrors - most bathroom mirrors exceed safe range |
| Self-drilling steel anchor (E-Z Anchor) | 30-50 lbs | Framed mirrors under 30 lbs | Most common DIY choice - use only in ½" or 5/8" drywall |
| Toggle bolt (butterfly anchor) | 50-100 lbs | Framed mirrors 30-60 lbs | Most secure drywall option - requires hole larger than screw head |
| Snaptoggle / Toggler bolt | 60-100+ lbs | Heavy or large frameless mirrors | Strongest drywall anchor - metal strap stays in wall if mirror removed |
| Wood screw into stud | 100+ lbs | Any mirror - strongest option | Use whenever mounting points align with studs - never skip this if available |
| Tile anchor (plastic plug) | 15-30 lbs per anchor | Tile wall installations | Requires diamond-tip drill bit - see tile section below |
A keyhole bracket is a small oval-slot fitting on the back of the mirror that slides over a corresponding screw head protruding from the wall. Most James Martin framed bathroom mirrors at Bathify - including the Addison, Bristol, Brittany, and Boston series - use this system with dual recessed premium keyhole hangers, allowing vertical or horizontal installation. Mounting hardware is included.
Lay the mirror face-down on a protected surface. Measure the center-to-center distance between the two keyhole brackets, and measure the distance from the top of the mirror to the keyhole bracket center (this is the "drop distance" - how far below the top of the mirror the screw must sit). Write both measurements down before the mirror goes back upright.
At your confirmed mirror center height: mark the two screw positions using the bracket spacing you measured. Use a spirit level to confirm both marks are perfectly level with each other - even a 1/8-inch height difference between two keyhole screws produces a visibly tilted mirror. Double-check with the level before drilling.
Drill pilot holes at both marked positions. If hitting a stud: drive a 2-inch wood screw leaving 3/8-1/2 inch of the screw head protruding from the wall - the keyhole slides over this head. If not hitting studs: install your chosen anchor (toggle bolt recommended for any mirror above 20 lbs), then drive the screw with the same 3/8-1/2 inch head protrusion.
With a second person holding the mirror, position the keyhole slots over the screw heads and slide the mirror downward until the screws seat in the narrow part of the keyhole slot. The mirror should not wobble or shift - if it does, re-check that both screws are equally tight and that the keyholes are fully seated. Confirm level with a bubble level placed on top of the mirror frame.
A French cleat consists of two matching strips - typically 3/4-inch plywood cut with a 45-degree bevel along one long edge. One strip mounts to the wall with the beveled edge pointing up and out; the matching strip attaches to the back of the mirror with the beveled edge pointing down and in. When the mirror is lowered toward the wall, the two beveled edges interlock, and gravity keeps the mirror securely in place. The system distributes the mirror's weight along the full cleat length - making it ideal for wide frameless mirrors and heavy framed mirrors that would stress individual keyhole bracket points.
Cut two strips of 3/4-inch plywood to approximately 80-90% of the mirror width. Rip a 45-degree bevel along one long edge of each strip using a table saw or circular saw with the blade set to 45 degrees. The two strips are mirror images of each other.
Position the wall cleat at the height where the mirror's top edge will land (accounting for the cleat height below the mirror's intended top position). Level it precisely - a non-level wall cleat is impossible to correct after the mirror is hung. Screw into studs wherever possible; toggle bolts for spans between studs. Use a minimum of 3 screws across the cleat length.
Attach the second cleat strip to the back of the mirror (beveled edge facing down and out) using screws appropriate for the mirror's frame material. For frameless glass mirrors, the cleat attaches to a separate mounting rail that is then bonded to the mirror back - this step may require silicone mirror adhesive to attach the rail.
With a second person, lift the mirror and lower the mirror-mounted cleat onto the wall-mounted cleat, allowing the beveled edges to interlock. The mirror will naturally seat against the wall and gravity holds it in place. Confirm level after hanging.
J-clips (also called J-channels or mirror clips) are small metal brackets that grip the edges of a frameless mirror glass - two J-shaped clips along the bottom edge support the mirror's weight, and additional retaining clips along the top and sides prevent the glass from tipping forward. This is the contractor method for large frameless plate glass mirrors - common in builder-grade bathroom renovations and in commercial settings.
Mark the bottom edge of the mirror position on the wall. Install two J-shaped bottom clips at the correct height, spaced to match the mirror width (typically at 20-25% from each edge). Level the two clips precisely - the mirror rests its weight on these. Screw into studs or use toggle bolt anchors rated for the mirror's full weight.
With a second person, tilt the mirror toward the wall and seat its bottom edge into the two bottom J-clips. The bottom of the mirror glass rests in the J-channel, supported by the wall anchors. Hold the mirror in position while the top clips are installed.
With the mirror seated in the bottom clips and held against the wall, install the top retaining clips at the correct position against the top edge of the glass. These clips don't bear weight - they prevent the mirror from tipping forward. Side clips are optional but recommended for mirrors above 36 inches wide.
Mirror adhesive (sometimes called mirror mastic) is a construction adhesive formulated specifically for bonding glass mirrors to wall surfaces. Standard construction adhesive is not suitable - many contain solvents that permanently damage the mirror's reflective silver backing. Always use a product specifically labeled for mirrors and verified solvent-free. Common US products include Liquid Nails Mirror Adhesive and Loctite PL 520 Mirror Adhesive.
The wall surface must be completely clean, dry, and flat. Sand away any paint drips or texture in the adhesive contact area. For tile walls: clean with isopropyl alcohol and allow to dry completely. For painted drywall: a single coat of primer-sealer on the contact area improves adhesion significantly. The mirror and wall surfaces must both be at room temperature (not below 40°F) for the adhesive to cure properly.
Mark the exact outline of the mirror on the wall with painter's tape. Mark the center of the mirror position for horizontal reference. Apply masking tape around the wall perimeter outside the mirror outline to protect paint from adhesive squeeze-out.
Apply mirror adhesive to the back of the mirror in a zigzag/S-curve pattern - not in solid dots or full coverage. Dots concentrate stress at single points; solid coverage traps air and creates suction that makes future removal destructive. Leave a 2-inch perimeter clear of adhesive around the mirror back to prevent squeeze-out from appearing at the edges. For mirrors above 25 lbs, add a temporary bottom ledge support (a piece of wood shimmed to the correct height, or painter's tape looped over a screw) to hold the mirror in position while the adhesive cures - adhesive alone won't hold a heavy mirror until fully cured (typically 24-48 hours).
Press the mirror firmly and evenly against the wall. Use painter's tape in an X pattern across the front of the mirror to hold it in position during the first 24 hours of curing - do not use the mirror during this time. Allow 48-72 hours before removing the tape support and treating the installation as permanent.
An LED bathroom mirror installation has two distinct stages: the physical wall-mount (same as a standard mirror, using keyhole brackets or the specific mounting system the mirror uses) and the electrical connection to power the LEDs, touch sensor, anti-fog, and any other electronic features. Both stages must be completed correctly and in the right sequence - physical mounting first, electrical second.
Turn off the bathroom circuit at the breaker and verify it's off with a voltage tester before touching any wires. Mount the mirror to the wall using the included hardware - most Vanity Art and ICO Bath LED mirrors use a keyhole bracket system. All included mounting hardware should be sufficient for the wall type; for drywall without stud alignment, use toggle bolt anchors sized for the mirror's weight.
For hardwired LED mirrors: the mirror has a lead wire (typically a 2-wire or 3-wire cable) that connects to the existing junction box in the wall. With the breaker confirmed off: match the wire colors following the mirror's wiring diagram (black/hot to black, white/neutral to white, green or bare copper/ground to ground). Use push-in wire connectors or wire nuts rated for the connection. Tuck the connection into the junction box and cover with the mirror's cable strain relief or the included connection plate. Restore power and test all mirror functions.
For plug-in LED mirrors: the mirror's power cord routes to an existing bathroom outlet. The outlet must be within reach of the cord without the cord crossing an area where it will be visible or create a hazard. Most US bathroom outlets are GFCI-protected (the type with a reset button) - required for outlets within 6 feet of a water source under the NEC. The plug-in LED mirror requires no electrical permit or wiring work.
Hardwire LED mirror installation in most US jurisdictions: Connecting an LED mirror to an existing bathroom junction box as a like-for-like replacement for a vanity light is typically treated as a non-permit repair/replacement in many areas. However, requirements vary by jurisdiction - California, New York, and some other states require a permit for any bathroom electrical work including fixture replacement. Check with your local building department if you're uncertain. Plug-in installation always avoids the permit question entirely.
Tile walls add a layer of complexity that catches many first-time installers off guard - the drill bit and technique that work in drywall will crack tile, and the anchors that work in drywall don't grip correctly in ceramic or porcelain. Two main approaches work reliably.
Required: Diamond-tip tile drill bit (3/16" or 1/4" for plastic tile anchors), masking tape applied to the tile surface at the drill point (prevents the bit from skipping on the glazed surface), low drill speed (no hammer mode), and water or a wet sponge to cool the drill point during drilling. Drill slowly with light, steady pressure. Once through the tile and any cement board, switch to a standard drill bit to complete the hole depth in the drywall behind. Insert plastic tile anchors (anchor must be rated for tile installation) and proceed with the appropriate mount method.
Silicone construction adhesive or mirror mastic rated for tile surfaces bonds directly to clean tile without drilling. Clean the tile contact area with isopropyl alcohol and allow to dry fully. Apply adhesive in the same zigzag pattern described in Method D. This approach is limited to mirrors under approximately 20-25 lbs and treats the installation as permanent (removal typically damages the tile face). Grout lines in the contact area reduce effective bond surface - adhesive-only on tile is not recommended for mirrors above 15 lbs without supplemental mechanical support.

Standard plastic wall plugs sold in hardware store variety packs are not rated for the weight of most bathroom mirrors. They hold under static load initially but pull out of the drywall under vibration, humidity cycling, or any side loading when the mirror is adjusted. Use self-drilling steel anchors minimum, toggle bolts for anything above 25 lbs.

Both mounting screws or cleat sections must be perfectly level with each other. Use a bubble level across both marks before drilling - not after. Once anchors are in the wall, correcting a height error requires filling the original holes, letting them cure, and drilling again.

Liquid Nails Original, PL300, PL400, and similar general construction adhesives contain solvents that react with the silver nitrate coating on the mirror back - causing black spots, streaking, and reflective failure that appears within weeks of installation and gets progressively worse. Only use products specifically labeled "mirror adhesive" or "solvent-free glass adhesive."

Before ordering, always mark the mirror's exact dimensions on the wall with painter's tape - width and height - and check clearance from the vanity faucet below, any overhead fixture above, and adjacent walls on each side. A mirror that looks correctly sized in a product photo can be surprisingly large or small in the actual bathroom. The tape-outline check costs nothing and takes two minutes.

Always turn off the bathroom circuit at the breaker panel before touching any wires. Verify it's off with a voltage tester - not by testing the switch - before making any electrical connections. Bathrooms are classified as wet locations under the NEC, and standard 120V household current is sufficient to cause a fatal electric shock in a wet environment.
Use this reference to confirm which installation method applies to your Bathify mirror before purchasing anchors or tools.
All James Martin mirrors at Bathify use dual recessed premium keyhole-style hangers for secure wall mounting, vertically or horizontally. Mounting hardware is included. Crafted from poplar solids with moisture and UV-resistant sealing. 1-inch bevel glass with premium finish. Use Method A - measure keyhole spacing from the mirror back before drilling, use toggle bolt anchors for any mounting point not hitting a stud.
All Vanity Art LED mirrors include mounting hardware for wall installation, vertical or horizontal. Physical wall-mount follows Method A (keyhole bracket or included wall-mount system per the instruction manual). Electrical connection via included cable - plug-in for most models. The Mira series (18"×36") includes a touch sensor with three adjustable color temperature settings (warm, cool, natural). Use Method E Stage 1 for physical mounting and Stage 2B for plug-in electrical.
Both ICO Bath dual-lit mirrors offer hardwired or plug-in installation - your choice at time of installation, not at purchase. Physical wall-mount uses included hardware (Method A). Electrical: hardwire (Method E Stage 2A) connects to an existing junction box where a vanity light was previously installed; plug-in (Method E Stage 2B) routes to a nearby GFCI outlet. All mounting hardware and electrical components included. 5-year ICO warranty covers both electrical and physical components.
Match the method to the mirror type, weight, and wall condition
Framed mirrors with keyhole brackets (James Martin series): Use Method A. Measure the keyhole spacing before touching the wall, use toggle bolt anchors for any mounting point not hitting a stud, and have a second person hold the mirror during hanging. All hardware included in the box.
Wide mirrors above 40 inches (heavy framed or large frameless): French cleat (Method B) distributes weight most effectively and is more forgiving of minor height variation than two individual screws.
Large builder-grade frameless glass: J-clip system (Method C) with optional supplemental adhesive for mirrors above 50 lbs. Stud attachment for the J-clips is strongly recommended for anything above 35 lbs.
Smaller frameless mirrors, permanent installation: Mirror adhesive (Method D) is appropriate if you will never need to remove the mirror. Use only mastic formulated specifically for mirrors - not standard construction adhesive.
LED mirrors (Vanity Art, ICO Bath): Method E. Turn off the circuit before touching any wires, follow the included wiring diagram exactly, and use a voltage tester to confirm the circuit is de-energized before making any connection. Plug-in installation avoids all electrical work and is appropriate for any bathroom with an accessible GFCI outlet within cord reach.
Shop Bathroom Mirrors at Bathify
Framed, frameless, and LED mirrors from James Martin, Vanity Art, and ICO Bath - all with included mounting hardware and clear installation instructions. Free shipping on orders over $50, USA-wide.


