







No attic access above the bathroom and no exterior wall within reach? You still have real, code-compliant venting options - soffit runs, gable walls, floor routing, roof caps, and booster fans. Here's how to choose the right one for your layout.
The short answer: an interior bathroom with no attic access and no exterior wall still has at least one workable venting path - it's just rarely the shortest, straightest one, and it almost always means running duct sideways through a joist bay or attic space to reach an actual exterior termination point, rather than skipping the outdoors altogether. At Bathify, we get this question constantly from homeowners with a windowless, centrally-located bathroom - a classic setup in condos, ranch-style additions, and multi-story homes where the bathroom in question sits below occupied space rather than under the roof.
Most bathroom fan installation guides assume the easiest case: an attic directly above the fan, or an exterior wall a few feet away. That assumption breaks down constantly in the real housing stock. Common scenarios we hear about include: a top-floor condo bathroom with a flat roof and no attic cavity at all; an interior, windowless bathroom in the middle of a single-story home with a finished, vaulted, or cathedral ceiling and no accessible attic space above it; a bathroom on the second floor of a multi-story home sitting over a finished first-floor ceiling with no crawlspace or basement route; slab-on-grade construction with no floor cavity to route through; and historic homes where the original framing, plaster ceilings, or masonry walls make cutting a straight path impractical.
None of these situations mean venting is impossible - they mean the straight-line path is blocked, and you need to route the duct horizontally or vertically through an available cavity to reach a wall, soffit, or roof surface that does face the outdoors. That's what the rest of this guide walks through.
Bathify doesn't sell exhaust fans or ducting hardware - our product range focuses on vanities, mirrors, medicine cabinets, towel warmers, and bathroom fixtures and accessories. What we do is write the most useful, accurate ventilation content we can, because a bathroom's ventilation strategy affects the lifespan of everything else in the room - mirrors, cabinetry, and finishes included. For the fan and ducting hardware itself, use the buying-guide posts linked throughout this article, or bring in a licensed HVAC or electrical professional for the installation.
A bathroom fan duct must always terminate outside the building envelope - through a wall, soffit, or roof cap with a backdraft damper - and never into an attic, wall cavity, soffit intake vent, or crawlspace. This is codified in the International Residential Code (IRC Chapter 15, Section M1501), which requires exhaust air to be conveyed directly to the outdoors, and it's reinforced by the Home Ventilating Institute (HVI) as one of the most common - and most damaging - installation mistakes in residential bathrooms.
The reasoning is straightforward physics. A bathroom fan moves a large volume of warm, saturated air out of the room in a short burst - a 15-minute shower can put a pint or more of water vapor into the air. If that air is dumped into an attic, a stud wall cavity, or a crawlspace instead of the outdoors, it simply relocates the moisture problem into an enclosed space with poor air exchange, where it condenses on cold roof sheathing, framing, or insulation. Over months and years this shows up as attic mold, rotted roof decking, rusted nail heads and hardware, and - in wall cavities - hidden mold growth behind the drywall that's often only discovered during a renovation.
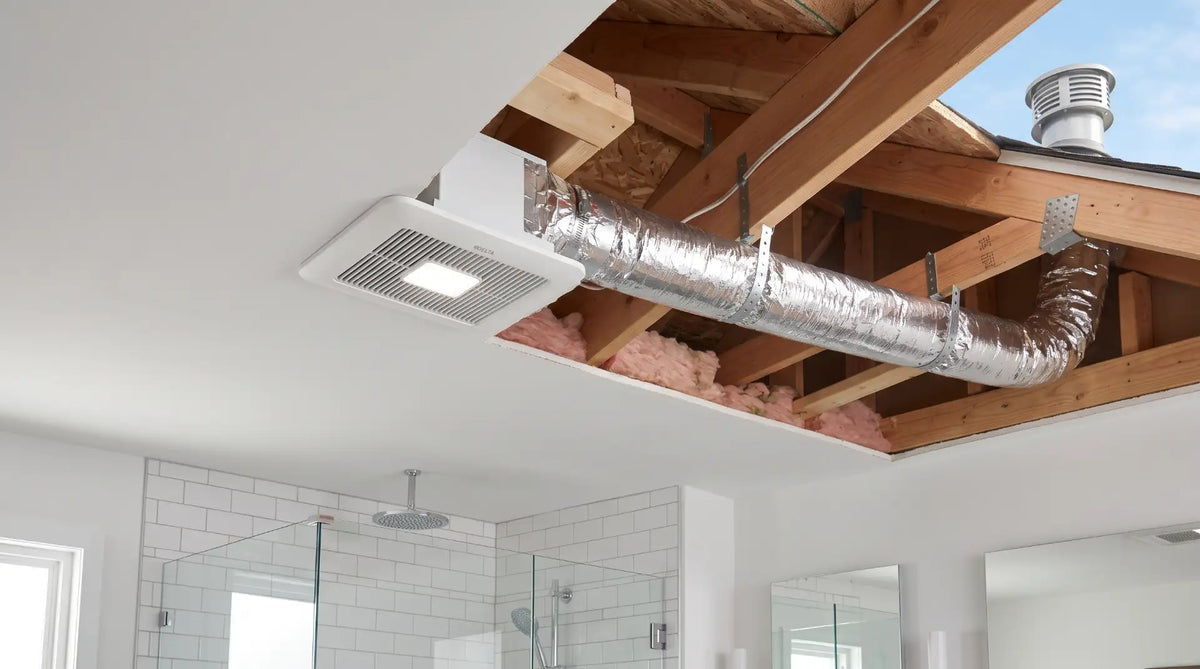
Soffit venting terminates the duct through the underside of the roof overhang using a dedicated exhaust vent cap - and it works well when the bathroom sits reasonably close to an exterior wall with an accessible soffit above, even if there's no clean straight shot through that wall itself. The duct runs a short distance through the attic space (or a truss cavity) and down to a soffit-mounted termination cap rather than punching straight out through the wall siding.
At Bathify, we generally point homeowners toward soffit venting when there's some attic access - even limited, low-clearance access - and an exterior wall is nearby but not directly adjacent to the bathroom, making a straight wall cap impractical. The soffit cap needs to sit well clear of any intake vents in the same soffit run, per the warning above, and should include a backdraft damper to stop outside air (and pests) from entering when the fan isn't running.
Gable wall venting routes the duct horizontally through the attic space to a termination cap mounted on a gable-end wall - the vertical, often triangular wall at the end of a pitched roof - rather than trying to exit through the roofline directly above the bathroom. This is the option we recommend most often for an interior bathroom that does have attic access above it, but where the nearest usable exterior surface is a gable wall some distance away rather than a soffit or roof cap directly overhead.
The trade-off is duct length: a gable run is frequently the longest of the alternative paths, which puts it closer to a fan's rated maximum equivalent duct length (see the airflow section below). We generally suggest confirming the total run length and elbow count against your fan's specified maximum before committing to a gable route, and budgeting for an in-line booster fan if the numbers are tight.
Measure the real distance, not the straight-line distance. A gable run rarely goes in a straight line - it typically has to clear roof trusses, existing ductwork, and wiring, which adds bends. Walk the actual path in the attic (or have your installer do it) and count every elbow before choosing duct diameter and confirming it's within the fan's rated limit.
When there's no attic above the bathroom at all - a common situation on the top floor of a flat-roofed building, or in a bathroom sitting under occupied space on a multi-story home - the remaining path is often down, not up. Routing the duct down through a joist bay below the bathroom floor to reach an exterior wall lower in the building, or to a crawlspace with its own path to the outdoors, is a legitimate strategy, but it comes with the tightest execution requirements of any option in this guide.
The critical detail: the duct cannot simply terminate in the crawlspace itself - a crawlspace is just as much an enclosed, unconditioned space as an attic, and dumping moist air into it causes the same mold and rot problems the IRC's outdoor-termination rule exists to prevent. The duct has to continue through the crawlspace (or joist bay) to an actual exterior wall or rim-joist vent cap. This route also usually means notching or drilling through multiple joists, which is structural work - check span tables or consult a structural professional before drilling anything larger than code allows through a load-bearing joist.
If there's attic space above the bathroom but no nearby exterior wall to tie into, venting straight up through the roof with a dedicated roof cap is often the cleanest solution - and typically the shortest duct run of any alternative path, since it doesn't need to travel sideways to reach a wall. A roof cap is a standard, widely available termination fitting with a built-in backdraft damper, installed through the roof deck and shingles/membrane with proper flashing to prevent leaks.
Roof venting only works, of course, when there's an attic or roof cavity directly reachable from the bathroom below - it isn't an option for the flat-roof, no-attic-cavity situations described above. Where it is available, we generally consider it the most airflow-efficient of the alternative routes because the run is short and mostly vertical, minimizing both duct length and elbow count.
Every one of the alternative routes above - soffit, gable, floor, and even roof venting with a longer offset - tends to add duct length and elbows compared to the simplest case of a fan sitting a few feet from an exterior wall. That matters because airflow loss compounds with both distance and turns: most fan manufacturers publish a maximum equivalent duct length, often in the 25-35 foot range for a straight run of smooth rigid duct, and every 90-degree elbow effectively subtracts another 5-10 feet from that budget. A gable or floor-routed run with three or four elbows can hit its effective limit well before the tape-measure distance would suggest.
When the math doesn't work - the calculated equivalent length exceeds the fan's rated maximum - an in-line duct booster fan, installed partway along the run, restores the airflow needed to actually clear the bathroom's air on the schedule the fan was sized for in the first place. We covered CFM sizing math in detail in our guide on how to choose a bathroom exhaust fan (CFM, sones & sizing) - the booster fan doesn't change the required CFM for the room, it just makes sure the fan you sized for that CFM can actually deliver it over a longer, more complicated duct path.
Use smooth rigid duct wherever possible, not flexible duct. Flexible ("flex") duct has a corrugated interior that creates far more airflow resistance per foot than smooth rigid metal duct - manufacturers typically rate flex duct as losing airflow at 2-3x the rate of rigid duct over the same distance. On a long alternative-routing run where every foot of equivalent length counts, rigid duct (or a smooth-wall flexible product rated for low resistance) makes a real difference in whether you need a booster fan at all.
Any duct run that passes through an unconditioned space - an attic, a crawlspace, or an uninsulated floor cavity - is longer and more exposed to temperature swings than a short direct run, which is exactly the situation most of these alternative routes create. Warm, moist exhaust air traveling through cold ducting condenses on the inside duct wall, and if that water has nowhere to go but back toward the fan, it drips into the fan housing, stains the ceiling, and eventually damages the fan motor.
Two details prevent this, and we consider both mandatory on any alternative-routed run through an unconditioned space: insulate the duct along its entire length in the unconditioned zone (insulated flexible duct or wrapped rigid duct both work, per typical manufacturer install specs), and maintain a continuous, gentle downward slope from the fan toward the exterior termination point, so any condensation that does form drains outside instead of pooling in a low spot or running back toward the fan.
For a genuinely interior bathroom with no attic, no accessible exterior wall, no usable floor cavity, and no crawlspace route - a true dead end on every alternative above - a ductless recirculating fan is the realistic fallback, and we say that with an important caveat. A ductless fan pulls bathroom air through a carbon or charcoal filter that captures odor and some airborne particulates, then blows the filtered air straight back into the room instead of exhausting it outdoors.
We're direct with our readers about what this does and doesn't solve: a ductless fan reduces smell, it does not remove humidity. The moisture stays in the room, which means it remains the primary driver of surface mold, mildew on grout and caulk lines, and peeling paint or damaged drywall over time. At Bathify, we recommend treating a ductless fan strictly as a last resort for a bathroom with no viable vent path - never as an equivalent substitute for true exhaust ventilation when any of the routing options above are actually achievable, even if they cost more or take more work to install. If you do end up with a ductless fan, replace the carbon filter on the schedule the manufacturer specifies, since a saturated filter stops doing even the odor-control job it was installed for.
A comfortable DIYer can reasonably handle: replacing an existing fan on an existing, correctly-routed duct; adding attic insulation and duct wrap to an accessible run; and installing a soffit or roof cap on a straightforward, already-open path, provided you're comfortable on a ladder and working in an attic. We often get asked where the line is, and for us it comes down to three triggers that mean it's time to call a licensed HVAC contractor or electrician: cutting a new penetration through a roof, exterior wall, or load-bearing floor structure; any new or modified electrical circuit for the fan (especially anything touching a GFCI-protected bathroom circuit); and any job in a jurisdiction that requires a mechanical or electrical permit for the work, since a licensed pro can typically pull that permit and handle the required inspection as part of the job.
Permit requirements vary significantly by city and county - always check with your local building department before cutting into a wall, roof, or floor structure for a new vent termination. A simple like-for-like fan replacement on an existing duct run usually doesn't trigger a permit; rerouting the ductwork to a new termination point almost always does.
| Method | Best-Use Scenario | Difficulty | Key Requirement |
|---|---|---|---|
| Soffit venting | Attic access available, exterior wall nearby but not adjacent | Moderate | Dedicated exhaust cap, kept clear of soffit intake vents |
| Gable wall venting | Attic access available, nearest exterior surface is a gable end wall | Moderate-Hard | Confirm total equivalent duct length against fan's rated max |
| Floor / joist-bay routing | No attic above; crawlspace or lower exterior wall reachable below | Hard | Insulation + continuous downward slope; must exit to true outdoors, not just the crawlspace |
| Roof cap venting | Attic/roof cavity directly above, but no nearby wall | Moderate | Correct roof flashing to prevent leaks |
| In-line booster fan | Any route exceeding the fan's rated max equivalent duct length | Moderate | Installed mid-run per manufacturer spec, sized to the CFM shortfall |
| Ductless (recirculating) | No viable duct path exists anywhere in the structure | Easy | Regular carbon filter replacement; does not remove humidity |
Match the routing strategy to what's actually reachable from your bathroom - then verify the airflow math
Attic above, exterior wall nearby but not adjacent: Soffit venting is usually the shortest, most practical run. Confirm the cap lands away from any intake vents.
Attic above, nearest exterior surface is a gable end: Gable wall venting works, but measure the real (not straight-line) duct length and elbow count before finalizing duct diameter.
Attic above, no nearby wall at all: A roof cap is typically the shortest, most airflow-efficient path - just get the flashing right or hire it out.
No attic above, but a crawlspace or lower exterior wall below: Floor/joist-bay routing works, but only if the duct continues all the way to a true outdoor termination, is fully insulated, and slopes continuously downward.
Any route with a long run or several elbows: Calculate equivalent duct length against your fan's rated maximum; add an in-line booster fan if the numbers don't clear it.
No attic, no wall, no crawlspace, no floor route - a true dead end: A ductless recirculating fan is the honest fallback. It controls odor, not humidity, so pair it with extra attention to squeegeeing surfaces, running a dehumidifier, and watching grout lines for early mildew.
Bathify's own product range is vanities, mirrors, medicine cabinets, towel warmers, and bathroom fixtures and accessories - not exhaust fans or ducting hardware. For sizing and buying the fan itself, see our CFM and sizing guide and best bathroom exhaust fans of 2026, or consult a licensed installer for anything involving new wiring or roof/wall penetrations. What we can speak to directly is what pairs well with a properly vented bathroom - because good ventilation is what makes these upgrades last.

Even the best-vented bathroom still fogs briefly during a hot shower. The Alder's 4000K LED strip and frameless, distortion-free surface pair well with a properly exhausted bathroom - the fan clears the humidity, the mirror's anti-fog-ready design keeps the glass usable the moment you step out. A working exhaust fan is what keeps condensation from settling permanently into the wall behind any mirror, LED or not.

Ambient humidity is hard on anything stored behind a mirror door - metal hardware corrodes, cardboard packaging softens, and adhesive labels lift faster in a consistently damp bathroom. A properly vented bathroom protects whatever's inside a medicine cabinet just as much as it protects the walls. The Jackson's interior LED lighting and 5-year warranty are a better long-term investment once the room's humidity is actually under control.
Shop: Jackson 24"×36" at Bathify → · Jackson 30"×36" at Bathify →

A towel that dries quickly holds far less moisture - and far less mildew smell - than one left damp on a hook, and that effect compounds with a bathroom that's already exchanging humid air efficiently. A heated towel bar isn't a substitute for exhaust ventilation, but the two work together: the fan clears the room's air, the warmer dries the towel itself faster than either would manage alone.
Finish the Room Once the Fan Is Sorted
Bathify carries the mirrors, medicine cabinets, towel warmers, and accessories that make the most of a properly ventilated bathroom - not the fan itself. Free shipping on orders over $50, shipped across the USA.


