







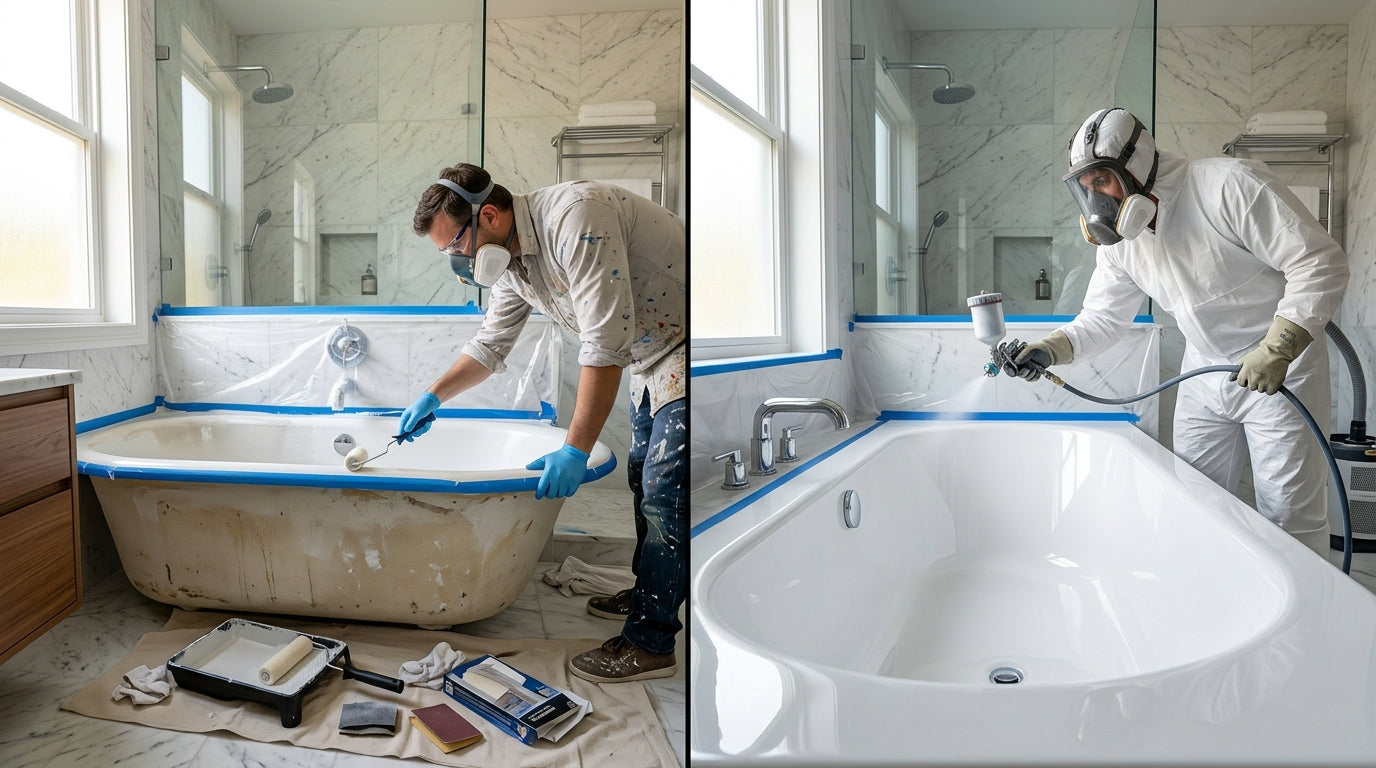
A stained, chipped, or dated tub doesn't always mean a full remodel. This guide covers exactly how bathtub refinishing works - what it costs in 2026, which tubs actually qualify, the safety warning most guides skip, and when replacing is the smarter money.
If your bathtub is stained, chipped, chalky, or just stuck in a 1980s almond color, the instinct is to rip it out. But tearing out a tub means demolition, new plumbing, tile repair, and days without a working bathroom - a project that routinely runs $2,000 to $8,000 or more. Refinishing exists to solve the same visual problem for a fraction of that, in a day or two, without touching the plumbing. The catch is that it's only the right call in specific situations, and done wrong, it fails fast.
First, the vocabulary - because it trips up almost every homeowner. Bathtub refinishing, reglazing, resurfacing, and reporcelaining all describe the same core process: cleaning and etching the existing tub surface, repairing chips and cracks, then spraying or rolling on a new bonded coating (usually an acrylic-urethane or epoxy). "Reglazing" and "reporcelaining" imply a factory-style porcelain finish, but no product truly re-fires porcelain onto a tub in your bathroom - they're marketing terms for the same coating process. A bathtub liner is a different thing entirely: a molded acrylic or PVC shell fitted over your existing tub. And replacement is exactly what it sounds like. This guide covers all three, but the headline decision - the one that saves or costs you the most money - is DIY refinishing versus professional reglazing.
If you already know refinishing is right and just want the cost and steps, jump to the cost breakdown and the DIY walkthrough. If you're not sure your tub is even a candidate, read the material section first - it will save you from coating a tub that shouldn't be coated. And please read the safety section before you buy any product: bathtub refinishing involves genuinely dangerous chemicals when done carelessly.
Most guides frame this as refinish-or-replace. That skips the middle option and leads people to the wrong choice. Here's the honest breakdown of all three, so you land on the right one before spending a dollar.
A bonded coating over your existing, structurally sound tub. Fixes stains, dullness, minor chips, and dated colors. Fastest and cheapest option. Not a fix for structural cracks, rust-through, or a leaking tub body. Lasts 2-5 years DIY, 10-15 years professional.
A molded acrylic or PVC insert fitted over the old tub. Covers cracks and rough surfaces without demolition. Professional-only, more expensive than refinishing, and if water gets trapped between the liner and the old tub, mold and odor can develop. Niche use case.
Full removal and a brand-new tub. The only option if the tub is cracked through, rusting, leaking, or you want to change size, shape, or type. Highest cost and disruption, but resets the clock 20-30 years and lets you upgrade to a modern soaking or freestanding tub.
Cosmetic problem, sound tub? Refinish. Structural damage but demolition is a dealbreaker? Liner. Cracked, leaking, or you want a different tub entirely? Replace. When in doubt, the deciding question is whether the damage is on the surface or in the tub body.
This is the section most guides gloss over, and it's the one that determines whether your refinish succeeds or peels in a year. Coatings bond differently to different surfaces. Before you buy anything, identify what your tub is made of - then check it against this table.
| Tub Material | Refinish? | Why / What to Know | Best Approach |
|---|---|---|---|
| Porcelain-enameled cast iron | Ideal | Hard, rigid, non-flexing surface holds a coating exceptionally well. The classic refinishing candidate - most vintage and clawfoot tubs. | Etch thoroughly; DIY or pro both viable. |
| Porcelain-enameled steel | Ideal | Same hard porcelain surface as cast iron, lighter body. Bonds well once properly etched and cleaned. | Etching agent is essential for adhesion. |
| Fiberglass (FRP) | Yes, carefully | Common in older builder-grade tubs. Refinishes well but needs extra prep and a longer, more patient application to avoid a rough finish. | Pro recommended for a smooth result. |
| Acrylic | Yes, with a flexible coating | Flexes slightly under weight and temperature. A rigid epoxy can crack over a flexing deck; a flexible urethane coating is far more durable. | Professional flexible urethane strongly preferred. |
| Cultured marble | Yes | Refinishes to cover dullness and dated veining. Surface must be de-glossed properly or the coating won't grab. | Pro for even color and coverage. |
| Already-refinished tub (peeling) | Strip first | Coating over a failing coating fails again. The old finish must be fully removed before recoating - this is where dangerous strippers get involved. | Professional strip & recoat only. |
Not sure whether your tub is cast iron or steel? Run a magnet along the side (both hold a magnet, but tap it - cast iron gives a dull thud, steel rings) and lift a corner if accessible - cast iron is dramatically heavier. The difference matters more for replacement than refinishing, but it also tells you how the tub will behave. For a full material breakdown, see our acrylic vs cast iron bathtub guide.
Here's where the DIY-vs-pro decision gets real. The headline numbers make DIY look like a runaway winner - a kit is a fraction of a professional job. But the sticker price on the box isn't the true cost, and the finish you get isn't the same product. Below is the honest 2026 math for both paths.
| Cost Factor | DIY Kit | Professional |
|---|---|---|
| Kit / base service | $30-$150 | $300-$650 (standard tub) |
| Fiberglass tub | Same kit, more prep time | $350-$1,000 |
| Required extras | Respirator, multi-grit sandpaper, etch, chemical-rated tape, sheeting: +$75-$150 | Included |
| Rust / chip repair | DIY repair epoxy: +$15-$40 | +$50-$200 |
| Realistic total | $100-$220 | $350-$700 (avg ~$480) |
| Warranty | None | 3-10 years |
| Lifespan | 2-5 years | 10-15 years |
| Cost per year of finish | ~$40-$70/yr | ~$35-$55/yr |
Read that last row carefully. Once you spread the cost across the life of the finish, professional reglazing is often cheaper per year than DIY - because a pro finish lasts three to five times longer. DIY wins on up-front cash and nothing else. That's not an argument against DIY; it's an argument for being honest about what you're buying. For a low-traffic guest bath or a rental you'll turn over in a few years, the up-front savings genuinely make sense. For the tub you soak in every night, the per-year math favors a professional.
Modern consumer refinishing kits (Rust-Oleum Tub & Tile, Homax, Bathworks and similar) use an etch-and-coat system - you chemically de-gloss the surface and roll or brush on a two-part acrylic/epoxy. Crucially, these avoid the methylene chloride strippers that make stripping an old coating so dangerous. If your tub has never been refinished and just needs a fresh surface, this is the safer DIY route. Here's the real process - prep is 80% of the job.
Ventilate and protect yourself
Open every window, run a box fan blowing air out, and wear a respirator rated for organic vapors (not a paper dust mask), chemical-resistant gloves, and eye protection. This is non-negotiable - see the safety section before you start.
Strip caulk and remove hardware
Cut out old caulk lines, unscrew the drain and overflow covers, and remove or protect the faucet. A clean perimeter is what separates a professional-looking edge from an obvious DIY one.
Deep clean, twice
Scrub away every trace of soap scum, body oil, and mineral buildup with an abrasive cleanser, then again with the kit's cleaner. Any residue left behind is a spot where the new coating will not stick. Rinse and let it dry completely.
Repair chips and etch the surface
Fill chips and gouges with the repair epoxy, sand smooth once cured, then apply the etching/de-glossing agent so the coating can chemically bond. Wet-sand with the grits your kit specifies. Wipe down and dry.
Mask everything and mix
Tape off walls, floor, and fixtures with chemical-rated tape and sheeting. Mix the two-part coating exactly per instructions - guessing the ratio is a top cause of a finish that never fully cures.
Apply thin, even coats
Roll or brush 2-3 thin coats, waiting the specified flash time between each. Thin and even beats thick and fast every time - thick coats sag, trap solvent, and stay soft. Work from the far end toward the drain so you're never leaning over wet coating.
Cure fully before use
Let the tub cure the full time on the label - typically 24-48 hours before water touches it, longer before heavy use. Re-caulk the perimeter only after the coating has cured. Rushing cure time is the single most common reason a DIY finish fails within months.

Bathtub refinishing has a genuine body count, and it's almost entirely tied to one chemical. This isn't scare copy - it's the reason the federal government stepped in.
Methylene chloride (also called dichloromethane) was the active ingredient in many bathtub stripping products. Inhaled in an enclosed bathroom, it can kill quickly - exposure to as little as six ounces of product has been enough to cause death, and it has claimed lives even of trained workers wearing protective equipment. Since 1980, at least 88 people in the US have died from acute methylene chloride exposure, many of them refinishing bathtubs in poorly ventilated rooms.
In April 2024 the EPA finalized a ban on all consumer uses and most commercial uses of methylene chloride under the Toxic Substances Control Act. If any product you're considering lists methylene chloride or dichloromethane on the label, do not buy it and do not use it. Choose a methylene-chloride-free system, or hire a professional.
Even the safer, methylene-chloride-free coatings are not harmless. The two-part acrylic and urethane coatings used in both DIY kits and professional jobs release isocyanate fumes during application, which irritate the lungs and can trigger occupational asthma with repeated exposure. That's why every credible refinishing process requires the same baseline: strong cross-ventilation, a properly fitted respirator rated for organic vapors, chemical-resistant gloves, and eye protection. A dust mask does nothing against these fumes.
When a refinished tub peels, bubbles, or streaks within a year, it's almost never the product - it's the prep or the application. Here are the five failures that account for the vast majority of DIY disappointment, and how to avoid each.
1. Incomplete cleaning
Invisible soap film and body oil are the number-one adhesion killer. If the coating lets go in sheets, this is almost always why. Clean far more aggressively than feels necessary, then clean again.
2. Skipping or rushing the etch
The etching step chemically roughens a glossy surface so the coating can grip. Skip it on a slick porcelain or acrylic tub and the finish has nothing to hold onto.
3. Coating too thick
Thick coats look faster but trap solvent underneath, stay soft, sag, and cure unevenly. Thin, patient coats are the professional secret.
4. Wrong coating for a flexing tub
Rolling a rigid epoxy onto a flexible acrylic tub sets it up to crack the first time the deck flexes under a bather's weight. Acrylic needs a flexible urethane - usually a professional product.
5. Using the tub too soon
Cure time on the label is a minimum, not a suggestion. Water or weight on a not-fully-cured finish leaves permanent marks and weak spots that fail early.
A professional charges more because you're not just buying a coating - you're buying spray application, commercial-grade materials, controlled conditions, and a warranty. Pros spray a flexible acrylic-urethane in even coats that self-level to a factory-smooth finish a roller can't match, and they do the prep at a level most homeowners won't. Labor is roughly 80% of the cost, which is exactly the part DIY skips.
Ask these before hiring: How many years of written warranty do you provide (3-10 is standard)? Are you fully insured? What coating system do you use, and is it methylene-chloride-free? How long until I can use the tub? Can you share recent local references or photos? A refinisher who hesitates on the warranty or insurance questions is telling you something.
The warranty is the real differentiator. A reputable refinisher backs the work for years against peeling, blistering, and adhesion failure - which no DIY kit offers. If the finish fails within that window, they redo it. That guarantee is a meaningful chunk of what your money buys.
A professionally refinished tub lasts about 10 to 15 years with proper care; a DIY refinish typically lasts 2 to 5 years. But those ranges hide a big variable: aftercare. The same professional finish can last 6 years or 15 depending entirely on how it's treated. Harsh cleaners, suction-cup mats, and standing water shorten any finish's life dramatically - which is why the care section below matters as much as the application.
A refinished surface is more delicate than factory porcelain, especially in its first month. Follow these rules and you'll get the top end of the lifespan range; ignore them and even a great professional job fails early.
Clean with only non-abrasive, non-bleach cleaners and a soft cloth. Rinse and dry the tub after use so water doesn't pool. Fix a dripping faucet promptly - constant drips wear a spot in the finish. Wait the full cure time before first use.
No abrasive powders, scouring pads, or bleach. No suction-cup bath mats - they're the #1 cause of finish peeling. Don't leave standing water or wet shampoo bottles sitting on the surface. Don't drop heavy objects; chips in a coating spread.
Refinishing is the right answer far more often than homeowners expect - but not always. Spending $500 to reglaze a tub that needs replacing in two years is money spent twice. Replace, don't refinish, when any of these are true:
The damage is structural, not cosmetic. Cracks through the tub body, rust-through on steel or cast iron, or a tub that flexes and creaks means the problem is under the surface, where a coating can't reach.
There's a leak or hidden mold. Water escaping the tub body or mold behind the surround is a moisture problem a new surface only hides. That needs to come out.
You want a different tub. If you're dreaming of trading a cramped builder-grade alcove tub for a deep freestanding soaker, no coating delivers that - only replacement changes the size, shape, or type.
You're staying long-term and the tub is near end-of-life. If you'll be in the home 15+ years and the tub already has real damage, replacement's higher up-front cost wins on the long horizon.
Measure your existing alcove or footprint before you shop so a new tub actually fits - our bathtub sizes & dimensions guide walks through it. Deciding between a built-in and a statement freestanding tub? The freestanding vs built-in comparison covers the trade-offs, and if you're replacing the tub you'll likely want a new filler too - see the bathtub filler faucet guide.
| Factor | DIY Kit | Professional Reglazing |
|---|---|---|
| Up-front cost | $100-$220 all-in | $300-$700 |
| Finish quality | Good with great prep; roller texture possible | Factory-smooth sprayed finish |
| Lifespan | 2-5 years | 10-15 years |
| Warranty | None | 3-10 years |
| Time / effort | A full hands-on day + cure | A few hours of your time; pro does the work |
| Safety risk | On you - ventilation & respirator critical | Managed by trained applicator |
| Best material fit | Cast iron / porcelain steel | Any, including acrylic & fiberglass |
| Best for | Rentals, guest baths, tight budgets | Primary bathrooms, long-term homes |
If the break-even points toward replacement, refinishing an old tub is money better spent on a new one you'll enjoy for decades. Bathify carries freestanding and drop-in bathtubs from Vanity Art, plus matching tub faucets and drains - all with free ground shipping across the continental USA on orders over $50. These are strong replacements across budget and style.

If you're leaving a dated built-in behind, the Trent is the natural step up - a full 67" soaking length with clean rectangular lines that read modern in almost any bathroom. Made from scratch- and stain-resistant acrylic reinforced with fiberglass, so it's lighter to install than cast iron and easy to keep looking new. The kind of tub that makes you glad you replaced instead of refinished.

For a true focal-point upgrade, the Nerio's solid-surface stone resin construction retains heat better than acrylic for longer soaks and has a dense, matte, spa-like feel no coating can replicate. A sculptural silhouette that turns a functional replacement into the centerpiece of the room. If you were refinishing to modernize an old tub, this is the destination.

Replacing a tub in a compact bathroom where a 67" model won't fit? The Palma's 54" footprint drops a genuine freestanding soaker into a small space, with a UPC-certified non-slip acrylic floor for safety. It's the answer when refinishing felt like the only option because the room seemed too small for anything new - it isn't.
Match the path to your tub, your budget, and how long you'll keep it
Refinish DIY if: the tub is cast iron or porcelain steel, structurally sound, and it's a rental, guest bath, or budget project where a 2-5 year finish is acceptable - and you can guarantee ventilation and wear a real respirator.
Refinish professionally if: it's your primary bathroom, the tub is acrylic or fiberglass (which need a flexible coating and expert prep), or you simply want a factory-smooth finish backed by a multi-year warranty. Per year of finish, this is often the better value.
Replace if: the tub is cracked, rusting, leaking, or you want a different size, shape, or type. Refinishing can't fix structure or change the tub - and if you're near end-of-life, a coating just delays the inevitable. Start with the bathtub buying guide and measure your space.
Whatever you choose: never use a methylene-chloride stripper, and treat the new finish gently - no abrasives, no suction-cup mats, and full cure time before first use. Aftercare is what turns the low end of the lifespan range into the high end.
Refinishing Isn't Worth It? Shop New Tubs at Bathify
Freestanding and drop-in bathtubs, tub faucets, and drains from Vanity Art and trusted brands. Free shipping on orders over $50, shipped across the USA, with a 30-day return policy.


