







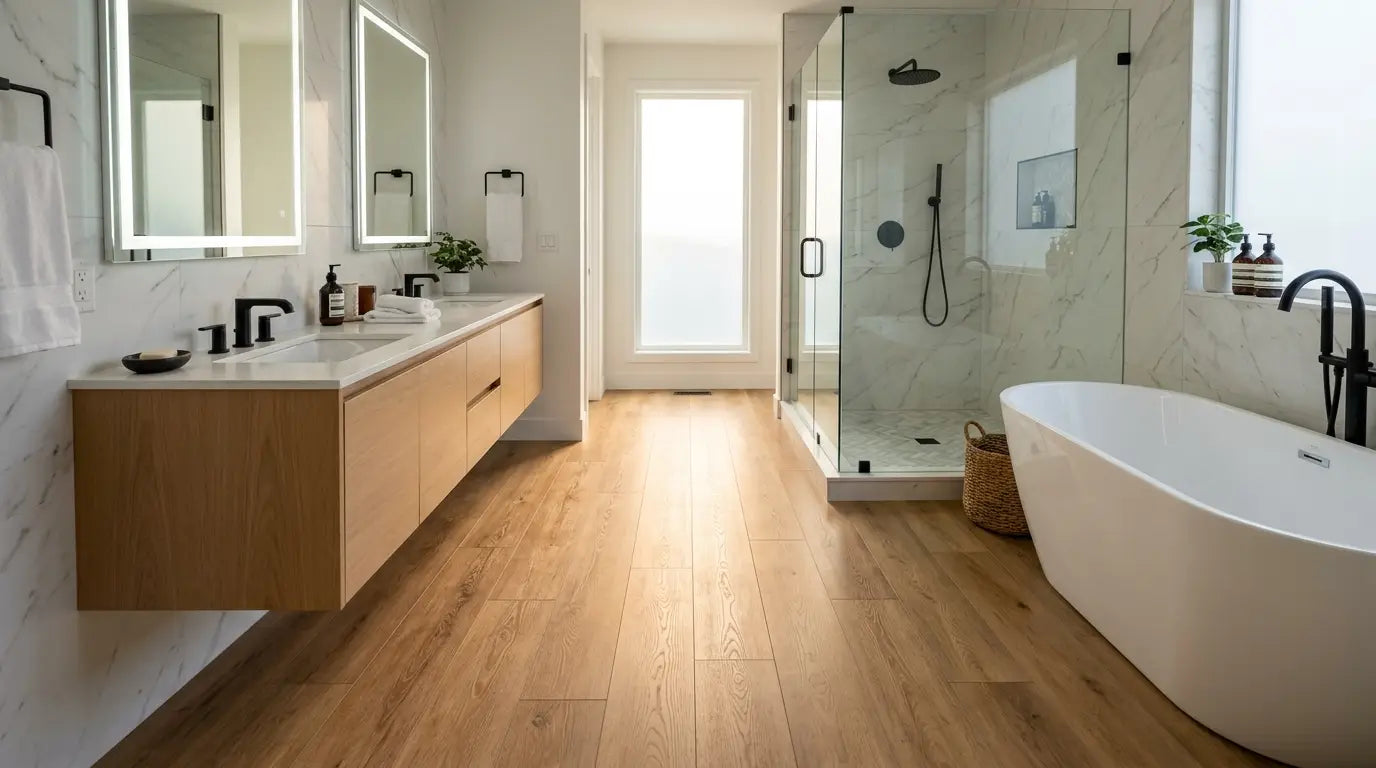
The short answer is yes - but only under three specific conditions most articles skip. Here's the honest 2026 breakdown of what really holds up in a wet room, where vinyl plank fails, and exactly how to install it so water never reaches your subfloor.
Vinyl plank flooring is marketed as 100% waterproof, which makes it sound like the obvious answer for a bathroom. But "waterproof plank" and "waterproof bathroom floor" are two very different things - and the gap between them is exactly where most vinyl plank bathroom installations succeed or fail. A plank can survive being fully submerged in a bucket of water and still let a bathroom floor fail, because in a real bathroom the water doesn't attack the surface of the plank. It attacks the seams, the wall edges, the door threshold, and the ring of flooring around the toilet.
So the honest answer to "does vinyl plank hold up in a bathroom" is: yes, remarkably well - if you buy the right core, install it correctly, and seal the perimeter. This guide skips the marketing and walks through what that actually means: which type of vinyl plank belongs in a bathroom, the failure modes competitors don't mention, click-lock versus glue-down for wet rooms, the specs worth paying for, and the installation details that keep water off your subfloor for the next two decades. It's the fifth guide in our bathroom flooring guide series.
If you just want the verdict, jump to the Short Answer below, then read the Installation section - those two cover 90% of what determines success. If you're comparing vinyl plank against tile before deciding, skip to the comparison table and cost breakdown. And if your bathroom includes a walk-in shower or wet room, read the shower section before you buy anything - that's the single most common mistake with LVP in bathrooms.
Rigid-core vinyl plank is one of the best-value bathroom floors available in 2026, and it genuinely holds up to daily bathroom life - steam, splashes, dropped toiletries, mopping, and the occasional overflow that gets cleaned up promptly. But "holds up" depends entirely on three conditions being met. Miss any one of them and you get the horror stories: swollen edges, lifting seams, or mold discovered under the floor a year later.
The core must be stone-plastic composite (SPC) or wood-plastic composite (WPC) - both waterproof and dimensionally stable in humidity. Skip flexible glue-down peel-and-stick as a primary bathroom floor; it's for low-moisture, low-traffic spots only.
A waterproof plank does not make a waterproof floor. Water enters at the edges. Seal the wall perimeter, door threshold, and the ring around the toilet flange with 100% silicone so water can never reach the subfloor.
Rigid core bridges small imperfections, but a subfloor that flexes or hides an existing leak will telegraph through and trap moisture. Confirm the subfloor is flat within spec, dry, and structurally sound before a single plank goes down.
Vinyl plank belongs on the main bathroom floor - not inside a shower pan or wet room where water sits and drains for hours. Those areas need a tanked, sloped, tiled surface. Respect that line and LVP performs for decades.
"Vinyl plank" is an umbrella term covering several very different products. The differences matter enormously in a bathroom, because two planks that look identical on the showroom floor can behave completely differently once there's water and humidity involved. Here are the categories you'll actually encounter, and how each one performs in a wet room.

A rigid, dense limestone-and-PVC core that's 100% waterproof and barely expands or contracts with temperature swings - ideal for humid, warm bathrooms. Feels firm underfoot, hides minor subfloor flaws, and resists denting from dropped objects. The default 2026 choice for a bathroom.

Also rigid and 100% waterproof, but with a foamed core that's softer, warmer, and quieter underfoot than SPC. Slightly more prone to denting under heavy point loads and marginally more temperature-sensitive. A comfortable choice for a primary bath where underfoot feel matters.

Not a different technology - "LVT" refers to luxury vinyl in a tile-shaped or stone-look format rather than wood-look planks. Available in both rigid-core and glue-down versions. For a bathroom, apply the same rule: choose a rigid waterproof core over a thin flexible tile.

Thin, flexible planks with a self-stick or trowel-applied adhesive. Cheap and DIY-friendly, but the seams are more vulnerable and the adhesive can release in a wet, warm bathroom over time. Acceptable for a low-moisture powder room; not the pick for a daily-use bath.
For a bathroom, "rigid core" is the phrase to look for. Whether it's labeled SPC or WPC, a rigid-core plank with a 100% waterproof core is what handles bathroom conditions. If a product is thin and flexible enough to roll up, it's a budget/low-moisture material - fine for a powder room, wrong for a shower-adjacent family bathroom floor.

Here's the distinction that determines everything. A rigid-core vinyl plank is genuinely waterproof - the material will not swell, buckle, or disintegrate when water sits on its surface. That claim is real. But a floor made of waterproof planks is only as waterproof as its weakest joint, and in a bathroom the weak joints are the edges: where the floor meets the walls, the door threshold, the tub apron, and the cutout around the toilet flange.
Water on a bathroom floor doesn't just evaporate. It runs to the lowest point and finds the smallest gap. On a floating floor with an unsealed perimeter, water can travel down the expansion gap at the wall, past the baseboard, and pool on the subfloor beneath planks that are themselves perfectly intact. The planks survive; the subfloor and the framing rot quietly underneath. This is why professional installers treat waterproofing as a system - the plank plus a fully sealed perimeter - rather than trusting the plank alone.
Every flooring material has failure modes, and pretending vinyl plank doesn't isn't helpful. Knowing exactly how and where it fails is what lets you install it so it doesn't. Here are the real-world ways a vinyl plank bathroom floor goes wrong - and every one of them is preventable.
By far the most common failure. Water reaches the subfloor through an unsealed wall perimeter, threshold, or the toilet cutout. The fix is simple and cheap: a bead of 100% silicone around the entire perimeter and every fixture penetration. Skip it and you've built a floor that hides moisture instead of repelling it.
Vinyl plank shrugs off splashes and quick spills. What it's not designed for is water that pools for hours - a slow toilet leak, an overflowing tub left unattended, or a supply line drip behind the vanity. The surface is fine, but prolonged standing water will eventually work through seams. Address plumbing leaks immediately; don't let water sit.
Thin peel-and-stick and flexible glue-down planks rely on adhesive that heat and humidity can soften over years of hot showers. Edges lift, seams open, and water finds its way in. This is a failure mode of the cheap, flexible category specifically - rigid-core click-lock and full-spread professional glue-down don't share it to the same degree.
A subfloor that flexes, has high spots, or hides prior water damage will show through the finished floor as bounce, gaps, or lifting seams over time. Rigid core forgives minor imperfections but can't fix a compromised subfloor. Inspect and repair first.
Rigid-core vinyl plank installs one of two ways, and the choice has real consequences in a bathroom. Click-lock planks snap together and "float" over the subfloor without adhesive; glue-down planks bond to the subfloor with a full spread of adhesive. Both can work in a bathroom - but they manage water risk differently.
| Factor | Click-Lock (Floating) | Glue-Down |
|---|---|---|
| Water risk in a bathroom | Hollow void beneath - trapped water can spread if edges unsealed | No void - bonded directly, water can't travel under planks |
| Best use case | Powder room, guest bath, low-traffic | Primary bath, family bath, high-traffic wet zones |
| Installation difficulty | Easier, faster, DIY-friendly | More labor, needs clean subfloor + adhesive skill |
| Repairability | Individual planks lift out more easily | Harder to remove a single plank |
| Perimeter sealing needed | Essential | Essential |
| Underfoot feel | Slightly softer, can feel hollow | Solid, tile-like stability |
For a busy primary or family bathroom, full-spread glue-down rigid-core plank is the lower-risk choice: bonding the plank to the subfloor removes the hollow cavity where trapped moisture could otherwise spread. For a powder room or occasional-use guest bath, a floating click-lock floor is faster to install and perfectly durable - provided the perimeter is sealed. Notice the constant in both columns: sealing the edges is essential either way. The locking method changes the water risk profile; the silicone perimeter is what actually closes the gap.
Two numbers on the spec sheet get confused constantly, and understanding the difference stops you from overpaying for the wrong thing. The wear layer (measured in mils - thousandths of an inch) is the clear protective top surface that resists scratches and scuffs. The overall thickness (measured in mm) is the whole plank including the core, and it drives how solid and stable the floor feels. Neither of these is the same as "waterproof" - that's the core material, covered above.
The subfloor is the part nobody photographs and everybody forgets - and it's where a surprising number of vinyl plank floors are quietly doomed before the first plank goes down. Rigid-core plank is forgiving of minor flaws, but it can't compensate for a wet, uneven, or structurally weak subfloor. Get this right and the finished floor performs; skip it and no plank quality will save you.
Flatness: Most rigid-core vinyl plank manufacturers specify a subfloor flat to within roughly 3/16" over 10 feet. High spots telegraph through and stress the locking joints; low spots create bounce. Grind down high spots and fill low spots with a floor patch or self-leveling compound before installing.
Moisture: On a concrete slab - common in basements and slab-on-grade homes - test for moisture before installing, since slabs can wick moisture from below. On a plywood or OSB subfloor, confirm there's no existing water damage from a prior leak. A pre-existing moisture problem trapped under a new floor becomes a mold problem you can't see.
Structure: The subfloor should not flex or bounce underfoot. A springy floor means inadequate support below, and that movement will eventually open seams. Reinforce or add an underlayment layer as needed so the base is solid before you begin.
Acclimate the planks first. Leave the boxed flooring in the bathroom (or a room at the home's normal living temperature) for 48 hours before installation so the material adjusts to the room's temperature and humidity. This reduces expansion and contraction after install - a small step that prevents gapping and buckling later, especially in a warm, humid bathroom.
If you read only one section of this guide, make it this one. The installation details below are what separate a vinyl plank bathroom floor that lasts 20 years from one that fails in two. None of them are difficult - they're just routinely skipped by people who assume "waterproof plank" means the job is done at the surface.
Floating rigid-core floors need a gap of roughly ¼ inch at every wall and fixed object so the floor can expand and contract without buckling. That gap is normally hidden by baseboard or quarter-round. In a bathroom, after the trim goes on, run a bead of 100% silicone caulk along the base of the wall to close the gap to water. You keep the floor's freedom to move and stop water from running down the edge - the best of both.
The toilet flange cutout is the single most common water-entry point in a bathroom floor. Seal around the toilet base with silicone (leaving a small gap at the back so a future leak is visible rather than hidden), and seal the joint where the floor meets the tub apron or shower base. These transitions see the most water; they deserve the most attention.
Where the bathroom floor meets the hallway flooring, use a proper transition strip and seal underneath it. An open threshold lets bathroom water migrate out - and outside water migrate in - beneath the planks. A sealed, correctly chosen transition strip closes that path.
Stagger end joints between rows (typically at least 6-8 inches apart) for a stronger, more water-resistant floor. When cutting planks around the toilet, vanity, and pipes, leave the small expansion gap there too - then seal it. A plank jammed tight against a fixture has nowhere to expand and will lift.
A tube of 100% silicone and a caulk gun cost a few dollars and take fifteen minutes to apply around the perimeter and fixtures. That single step is the difference between a floor that hides water and a floor that repels it. It's the highest-return fifteen minutes in the entire installation - never skip it in a bathroom.
Tile is the traditional bathroom benchmark, so the honest question is how vinyl plank stacks up against it. The answer is nuanced: tile wins on ultimate longevity and shower suitability, vinyl plank wins on cost, comfort, warmth underfoot, and installation speed. Here's the head-to-head.
| Factor | Rigid-Core Vinyl Plank | Porcelain / Ceramic Tile |
|---|---|---|
| Waterproof (surface) | Yes (core) | Yes (glazed) |
| Suitable inside a shower | No | Yes |
| Comfort / warmth underfoot | Warmer, softer, quieter | Cold and hard without heating |
| Installation speed & DIY | Fast, DIY-friendly (click-lock) | Slower, skill-intensive, grout curing |
| Grout to maintain | None | Yes - needs cleaning & sealing |
| Typical lifespan | 15-25 years | 25-50+ years |
| Repair a damaged area | Replace affected planks | Match & re-set individual tiles |
| Material cost (installed) | Lower | Higher |
| Best fit | Budget, comfort, speed, wood-look | Longevity, showers, resale-premium baths |
If you want the shortest path to a warm, comfortable, wood-look bathroom floor on a sensible budget, rigid-core vinyl plank is hard to beat. If you're renovating a primary bathroom for long-term value, want a continuous tiled look into the shower, or are prioritizing resale in a high-end home, tile earns its higher cost. Many homeowners split the difference: tile in the wet shower zone, vinyl plank across the main floor. For the tile side of that decision, our guides on porcelain vs ceramic tile and the best non-slip bathroom floor tiles go deeper.
Cost is one of vinyl plank's strongest arguments in a bathroom - it delivers a wood-look, comfortable, waterproof floor for meaningfully less than tile, and the faster installation lowers labor too. Bathrooms are small, so total project costs stay modest. Here's a realistic 2026 range for materials and typical professional installation; DIY click-lock installs remove most of the labor line.
| Line Item | Budget | Mid-Range | Premium |
|---|---|---|---|
| Vinyl plank material (per sq ft) | $2-$3 | $3-$5 | $5-$8+ |
| Wear layer / core | 12 mil · 4mm SPC | 12-20 mil · 5-6mm | 20 mil · 6-8mm WPC/SPC |
| Installation (per sq ft) | DIY | $2-$4 | $4-$7 (glue-down) |
| Toilet pull & reset + wax ring | DIY | Budget for it | Included in reno |
| Typical 40 sq ft bathroom total | ~$100-$200 (DIY) | ~$250-$400 | ~$450-$700+ |
No - and this is the single most important limitation to respect. Vinyl plank flooring is engineered for the main bathroom floor, where it handles splashes, steam, and quick spills. It is not designed for a shower pan, shower walls, or a wet room where water flows and drains continuously and needs to be channeled to a drain across a sloped, fully waterproofed surface.
Shower areas require a proper waterproofing system: a sloped, tanked substrate with a waterproofing membrane and tile, or a purpose-built molded shower pan. Installing vinyl plank inside a shower will void the manufacturer's warranty, can't provide the required slope-to-drain, and lets water travel under the planks to the subfloor. The correct approach is a clean boundary - tile or a shower pan inside the enclosure, vinyl plank across the dry-zone floor outside it, with the transition sealed. Respect that line and vinyl plank performs beautifully for the role it's actually built for.
One of vinyl plank's underrated bathroom advantages is that it already feels warmer underfoot than tile or stone - the material simply doesn't pull heat from your feet the way ceramic does. But you can go further and pair it with electric radiant floor heating for genuine warmth on a cold morning, provided you follow the temperature rules.
Many rigid-core vinyl planks are compatible with low-voltage electric radiant heating systems, but with an important caveat: manufacturers cap the maximum floor surface temperature - commonly around 82-85°F (about 28-29°C) - to prevent the plank from expanding, gapping, or discoloring. You'll need a compatible system and a thermostat that respects that ceiling, and you should always confirm the specific plank's rating before pairing it with heat. Ramping the temperature up and down gradually, rather than in sharp swings, also protects the floor. If a warm bathroom floor is a priority for your renovation, read our dedicated guide on heated bathroom floors - cost, types, and whether it's worth installing before you choose your flooring and heating together.
Vinyl plank holds up in a bathroom - if you buy the right core and seal the edges
Choose vinyl plank if: you want a warm, comfortable, wood-look floor on a sensible budget, with fast installation, no grout to maintain, and genuine waterproof performance across the main bathroom floor. Go with a rigid SPC or WPC core, a 12-20 mil wear layer matched to your traffic, and glue-down for busy baths or click-lock for powder rooms.
The three non-negotiables: a 100% waterproof rigid core, a fully sealed silicone perimeter (walls, threshold, toilet, tub), and a flat, dry, structurally sound subfloor. Meet all three and the floor lasts 15-25 years.
Choose tile instead if: you need flooring inside a shower or wet room, you're renovating a high-end primary bath for maximum longevity and resale, or you want one continuous tiled surface from floor into shower. Tile costs more and installs slower but wins on ultimate lifespan.
The best of both: many homeowners run tile in the wet shower zone and rigid-core vinyl plank across the main floor - waterproof where it counts, warm and budget-friendly everywhere else.
A flooring project is the ideal moment to update the fixtures that sit on - or get pulled during - the install. The toilet has to come off and go back on anyway, a freestanding tub sits directly on the finished floor, and a floating vanity lets your new plank run continuously underneath for a cleaner, more spacious look. While Bathify doesn't sell flooring, these are the fixtures worth coordinating with your new vinyl plank floor.

A wall-mounted floating vanity is the ideal partner for vinyl plank: because it hovers off the floor with no base or toe kick, your new plank runs continuously beneath it, making the floor - and the whole bathroom - read larger and more intentional. It also keeps the cabinet base up out of any floor-level moisture. Bathify carries floating vanities from Kube Bath, Vanity Art, Cutler, and ICO Bath in modern and transitional finishes.

Any full-floor replacement means the toilet gets pulled and reset with a fresh wax ring - which makes it the perfect time to upgrade rather than reinstall an aging unit. A new comfort-height, water-efficient toilet costs little extra in labor when the floor is already open and the toilet is already off. Bathify carries 1-piece, 2-piece, and wall-mount toilets from TOTO and more.
Shop: Toilets at Bathify →

A freestanding tub sits directly on the finished floor, so it's best set after your new vinyl plank goes down - and the continuous plank around its base looks far cleaner than tile grout lines meeting a tub apron. If a freestanding soaker is part of your renovation, coordinate its placement with your flooring layout. Bathify carries freestanding tubs from Kube Bath and Vanity Art.
Finishing Your Bathroom Renovation?
New floor down? Pair it with the fixtures that sit on it - floating vanities, toilets, freestanding tubs, and more from Kube Bath, Vanity Art, TOTO, and ICO Bath. Free shipping on orders over $50, shipped across the USA.


