







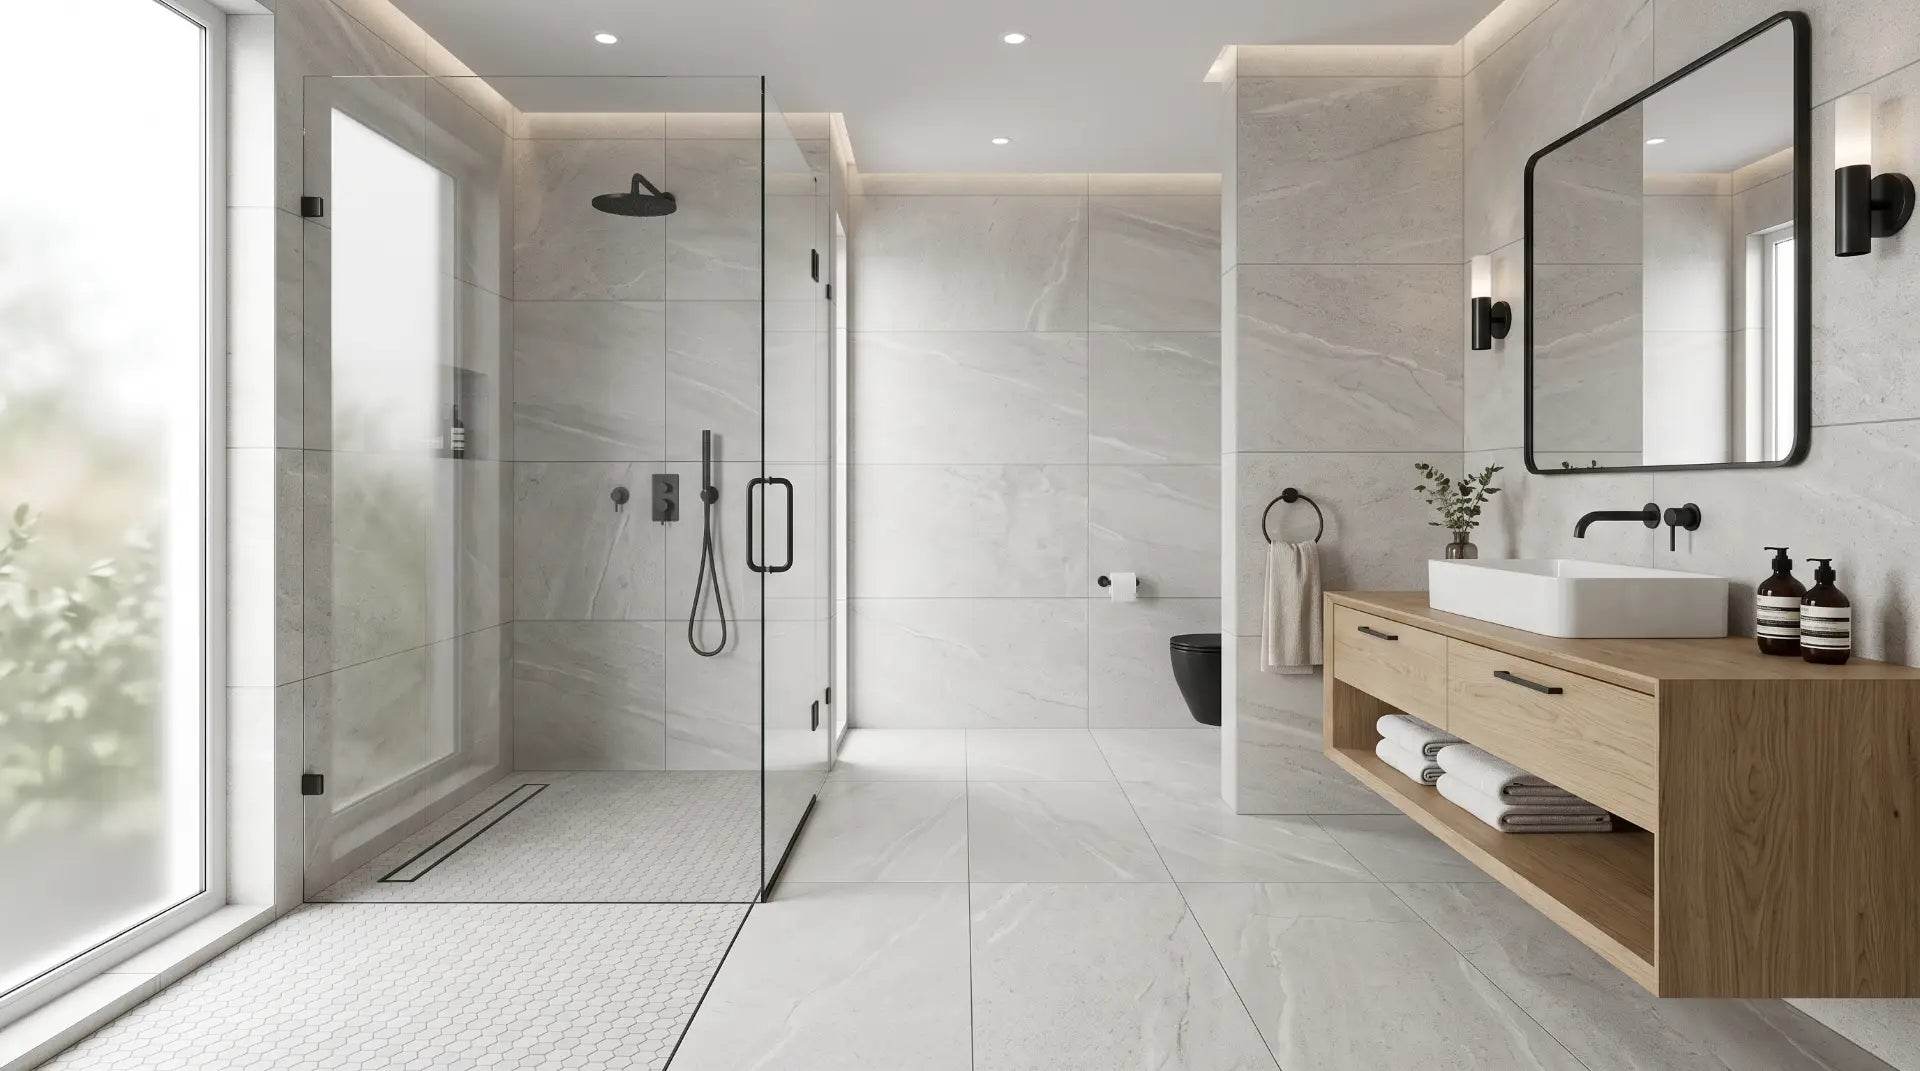
Floor tile on shower walls? Usually yes. Wall tile on the floor? Almost never. And the shower floor plays by rules of its own. Here is exactly where one tile can run - and the drain decision that changes the answer.
Yes - you can use the same tile on your bathroom floor and your shower walls. Floor tile is built to a tougher standard than wall tile, so putting it on a wall is over-engineering, not a compromise. This is the single most common version of the question, and the answer is a clean yes with two boxes to tick: weight and mortar.
No - you cannot run wall tile down onto the floor. That is the one direction that genuinely fails. Wall-only tile has a softer body, a thinner glaze, and usually no published slip rating. It will craze, wear, and crack under foot traffic, and it is a slip hazard in a wet room.
And the shower floor is its own separate decision - not because of the tile, but because of the drain. A traditional center drain forces the floor to slope from four directions at once, and no large tile can bend into that compound shape. That physically caps you at small mosaics. Swap to a linear drain and the floor slopes in one flat plane instead, which means large-format tile becomes possible - and the same tile really can run from the doorway to the shower wall without a break.
Tile ratings only move in one direction. A tile approved for floors can always go on a wall. A tile approved only for walls can never go on a floor. Everything else in this guide is detail - but if you remember nothing else, remember that ratings flow downhill, never up.
The reason "can I use the same tile everywhere?" has a complicated answer is that a bathroom is not one surface. It is three or four surfaces with genuinely different physical demands, and homeowners tend to shop as though they are shopping for one. A tile that is perfect in one zone can be a genuine safety problem in another - and it will still look identical in the showroom.
Sort the room into zones before you sort through tile. Each zone has a short, non-negotiable list of what the tile must be able to do:
Must survive daily foot traffic, dropped objects, and the weight of a vanity or toilet. Needs a PEI abrasion rating (3+ is the safe residential spec) and a published wet DCOF of at least 0.42. This is the most demanding zone in the room from a durability standpoint.
Nobody walks on a wall. Slip resistance and abrasion are irrelevant here. What matters is the assembly behind it - cement backer board or a waterproof foam board, a bonded membrane, and a non-sag mortar. The tile itself is the least demanding part of the equation.
Sloped, permanently wet, walked on barefoot, and coated in soap film - the highest-risk surface in the house. Needs a higher wet DCOF than the bathroom floor (0.50+ is the working minimum) and must physically conform to the slope, which caps tile size unless the drain type changes.
Splash exposure rather than direct spray, and no traffic at all. This is where genuinely decorative tile - handmade zellige, glass mosaic, thin ceramic - belongs. It is also the zone where you can safely break the one-tile rule for a deliberate accent.

This is the question most people are actually asking, and the answer is a confident yes. Floor tile is manufactured to a higher standard than wall tile in every measurable respect: a denser body, a harder glaze, and a far higher breaking strength. ANSI A137.1 sets a minimum breaking strength of roughly 250 lbf for floor tile, while wall-only tile is held to a fraction of that. Installing a floor-rated tile vertically asks less of it than the job it was designed for.
Designers do this constantly. Running a 12×24 porcelain up the shower wall and out across the bathroom floor is one of the defining looks of the last five years, and it is entirely code-compliant. But there are two practical checks that separate a clean installation from a callback.
Weight. Floor tile is thicker and heavier than wall tile - that is the whole point of it. A 12×24-inch porcelain at 3/8-inch thickness weighs roughly 4-5 pounds per square foot before you add mortar, which typically adds another 2-3 pounds per square foot. A thick natural stone can push the assembly close to double that. Before you commit, confirm the total weight of the tile-plus-mortar assembly against your backer board manufacturer's published rating. This is a spec sheet check that takes five minutes and prevents a wall that slowly sags.
Mortar. A heavy tile on a vertical surface wants to slide down the wall while the mortar cures. The fix is a non-sag mortar - designated by ANSI with the letter T after the standard number (A118.4T or A118.15T). For any tile with a side longer than 15 inches, you also want a large-and-heavy-tile (LHT) mortar and a lippage control system, because a large tile on a slightly out-of-plane wall will telegraph every imperfection. The wall must be flat to within 1/8 inch in 10 feet before tiling begins.
One aesthetic note worth flagging: floor tile on a wall reads different from wall tile on a wall. Floor tiles are usually rectified (machine-cut to a precise edge), which allows very tight grout joints and a near-seamless field. Traditional wall tile is often cushion-edged, which produces a softer, more traditional joint. Neither is wrong - but if you are trying to match new floor tile to an existing wall tile, that edge difference is what will make it look mismatched even when the color is identical. For more on how format drives the way a bathroom reads, see our guide to large format tiles vs small mosaic.

Here is where homeowners get into genuine trouble - usually because they fell in love with a beautiful wall tile in a showroom and nobody stopped them. Wall-only tile fails on a floor in three separate ways, and they compound.
It cracks. Wall tile has a softer, more porous body and a much lower breaking strength. Under a point load - a dropped shampoo bottle, a stiletto heel, the corner of a vanity leg - it fractures where a floor tile would not. This is not a slow degradation; it is a single bad day.
It wears through. The PEI abrasion scale runs 0 to 5, and a great many decorative wall tiles are Class 0 or Class 1, meaning the manufacturer is explicitly telling you the glaze is not built for shoes. Put it in a walking path and within a few years you will see a dull, worn track running from the door to the vanity - permanently, because the glaze is gone, not dirty.
It is slippery. Wall tiles frequently carry no published wet DCOF at all, because slip resistance is not tested for a surface nobody stands on. A glossy wall tile on a wet bathroom floor is one of the more dangerous surfaces you can build in a home - and this is precisely the scenario our non-slip bathroom floor tile guide exists to prevent.
Most articles on this topic stop at "use mosaic on the shower floor" without explaining why - which leaves homeowners assuming it is purely a slip-resistance preference they can override with a nice matte finish. It is not. There are two independent constraints, and only one of them is about grip.
Under ANSI A326.3, a tile for a level interior wet area - a normal bathroom floor - needs a wet DCOF of 0.42 or higher. A shower floor is a different category entirely. It is sloped, walked on barefoot, and permanently coated in a film of soap and conditioner residue, which is a far more aggressive lubricant than plain water. The standard classifies this as "Interior, Wet Plus," where 0.50 is generally accepted as the working minimum and many specifiers push toward 0.60 for barefoot wet areas.
Worth being honest about: DCOF is a comparison tool, not a safety guarantee, and the standard itself says so. A number above 0.42 does not mean a floor is safe - it means it cleared a lab threshold under controlled conditions. Texture, maintenance, and grout density all matter alongside the figure.
This is the constraint that actually decides your tile size, and it has nothing to do with grip. Plumbing code requires a shower floor to slope toward the drain at a minimum of ¼ inch per foot (and no more than ½ inch per foot). With a traditional center drain, that slope has to come from every direction at once - all four sides falling inward to a point in the middle.
That produces a compound, warped surface. A tile is a rigid flat plane. It cannot bend into a warped surface. The larger the tile, the worse the mismatch, and the result is lippage - one tile edge sitting proud of its neighbor, which is both an appearance defect and a stubbed-toe waiting to happen. Industry practice on a center drain is therefore to limit shower floor tile to roughly 1-inch, 2-inch, or 3-inch mosaics, or 4-inch tiles. Larger sizes are only permissible if the resulting lippage stays within industry tolerance, which on a compound slope it usually does not.
Mosaic is not a shower-floor tradition because it looks nice. It is the only format that conforms to a compound slope while adding hundreds of grout joints - and each of those joints is a small textured edge that gives bare feet something to grip. The mosaic solves both constraints simultaneously. That is why it has survived every design trend of the last fifty years.
Here is the part that most tile guides never get to, and it is the single most useful thing in this article: the tile size limit on a shower floor is created by the drain, not by the tile. Change the drain and the limit disappears.
A linear drain is a long, narrow trench drain set along one wall of the shower, or directly at the shower entry. Because the water is collected along an entire edge rather than a single center point, the floor no longer needs to fall from four directions. It slopes in one flat plane, from the high side down to the drain, at the same ¼-inch-per-foot rate the code requires.
A single flat plane is something a rigid tile can sit on perfectly. Which means a linear drain accommodates 12×24-inch tile - and larger - on a shower floor without lippage. It also eliminates the "bird bath" low spots that plague poorly executed center-drain pans. This is the standards-based method behind virtually every seamless, curbless, one-tile shower you have seen in a design magazine.
Tileable grates make the drain disappear. The best linear drains ship with a tile-insert grate - a shallow tray in the drain cover that you fill with a cut piece of your own floor tile. Water enters through a narrow slot around the perimeter. The result is a shower floor where the drain is visually invisible: the tile field simply runs straight over it, uninterrupted. If your entire goal is one continuous tile from the bathroom doorway to the shower wall, this is the component that finishes the illusion. Bathify's Kube 27.5" Linear Drain with Tile Grate is exactly this configuration.
One more consideration before you commit: a linear drain is a rough-in stage decision, not a finish-stage one. The drain body, its position, and the slope of the mortar bed all get built before a single tile is set. If your shower is already framed with a center drain, converting to linear means opening the pan. Decide this at the same time you decide the tile - not after. Our step-by-step bathroom floor tiling guide walks through where each decision lands in the build sequence.
If a linear drain is out of budget or out of scope - and for a straightforward tub-to-shower conversion, it often is - there is a second route to the same visual result, and it is what most designers actually specify.
Buy one tile collection in two formats. Most quality porcelain series are manufactured in a large format (12×24, 24×24, 24×48) and a coordinating mosaic sheet - typically 2×2 squares or a hexagon - pressed from the identical body, in the identical color, with the identical finish. Same clay, same glaze, same dye lot if you order together.
Run the large format across the bathroom floor and up the shower walls. Use the matching mosaic on the shower floor only. What you get is a bathroom that reads as a single continuous material - because the color, veining, and finish genuinely are identical - while the shower floor quietly gets the slip resistance and slope conformity it needs. The change in scale registers as a deliberate design decision rather than a compromise, because that is what it is.
This approach also has an underrated safety benefit: the shift in format gives bare feet a tactile cue that the surface underfoot has changed and become more slippery. A perfectly uniform floor gives no such warning. It is a small thing, but it is the kind of small thing that matters in a household with young children or aging parents.
Every claim in this guide reduces to four figures on a manufacturer's spec sheet. Learn to read these and you will never need to ask a salesperson whether a tile "works in a shower" again - you will already know.
| Spec | What It Measures | Bathroom Floor | Shower Walls | Shower Floor |
|---|---|---|---|---|
| PEI Rating (0-5) | Glaze abrasion resistance - how well the surface survives foot traffic | Class 3+ recommended (Class 2 is the technical minimum) | Irrelevant - nobody walks on a wall | Class 3+; unglazed porcelain and mosaics often rate by other measures |
| Wet DCOF (ANSI A326.3) | Dynamic coefficient of friction - grip when wet | 0.42 minimum ("Interior, Wet") | Not applicable | 0.50+ working minimum ("Interior, Wet Plus"); 0.60 preferred barefoot |
| Water Absorption | How much moisture the tile body takes on | Porcelain (≤0.5%) strongly preferred | Ceramic acceptable; porcelain still better | Porcelain (≤0.5%) - impervious, non-negotiable |
| Breaking Strength | Load the tile withstands before fracturing | ~250 lbf minimum for floor-rated tile | Low bar - wall tile qualifies | Floor-rated; mosaics gain strength from the setting bed |
| Finish | Surface texture and gloss level | Matte or satin; avoid polished | Anything - polished is fine and easier to clean | Matte or structured only; polished is a hazard |
Print this, screenshot it, or take it to the tile showroom. This is the whole guide compressed into six lines.
| Tile Type | Bathroom Floor | Shower Walls | Shower Floor (center drain) | Shower Floor (linear drain) | Tub Surround |
|---|---|---|---|---|---|
| Large-format matte porcelain (12×24+) | Yes | Yes | No - slope | Yes | Yes |
| Polished / glossy porcelain | Risky | Yes | No | No | Yes |
| Porcelain mosaic (1"-3") | Yes | Yes | Yes | Yes | Yes |
| Ceramic wall tile (subway, zellige) | No | Yes | No | No | Yes |
| Glass mosaic | No | Yes | Only if floor-rated | Only if floor-rated | Yes |
| Natural stone (marble, travertine) | Sealed | Sealed | Honed mosaic only | Honed, sealed | Sealed |
| Slate / structured stone-look porcelain | Yes | Yes | Small format | Yes | Yes |
| Vinyl plank (LVP / LVT) | Yes | No | No | No | No |
Natural stone deserves its own footnote here: it can work in every zone, but it demands a sealing commitment that most homeowners underestimate - and marble in particular etches from ordinary bathroom products. Read the honest version in our marble bathroom floors guide before committing it to a shower. And if you are considering vinyl plank for the wet zone: it belongs on the bathroom floor, never in the shower, for reasons covered in our vinyl plank flooring in bathrooms guide.
Both, and which one you get depends entirely on whether you plan for it.
The case for it. Every material change in a bathroom is a visual stop. Floor tile ends, a curb begins, a different wall tile takes over - and each of those transitions tells the eye where the room stops. In a 5×8-foot bathroom, that adds up to a space that reads as a series of small compartments rather than one room. Run a single tile continuously across the floor and into the shower, and those stops disappear. The eye reads one uninterrupted plane and the room feels meaningfully larger than its square footage. This is the single most reliable spatial trick available in a small bathroom, and it costs nothing extra to execute - the effect is strongest when the shower is curbless and the grout grid lines up across the threshold.
The case against it. Uniformity with no relief anywhere is monotony. A bathroom tiled edge to edge in one greige porcelain with matching grout can read less like a spa and more like a very clean commercial restroom. There is no focal point, nothing for the eye to land on, and the room ends up feeling institutional rather than considered.
Run the single field tile everywhere for continuity - then break it in exactly one place. A shower niche in a contrasting material. A single feature wall behind the shower head. A patterned floor confined to the vanity zone. One deliberate interruption gives the eye somewhere to go, and it makes the surrounding continuity read as an intentional decision rather than a budget one. Two or more accents and you have lost the effect entirely.
If the accent is where you want to spend your design energy, the niche is the highest-leverage place to do it - it is small, it is at eye level, and it is already a frame. A contrasting mosaic, a stone slab back, or a bold pattern inside the niche costs very little and carries the entire room. For pattern discipline generally, our patterned bathroom tile guide covers how to use it without overdoing it.
You can specify the correct tile in all three zones and still end up with a bathroom that looks like three separate rooms. The continuity is created - or destroyed - by three details that get decided during installation, not during shopping.
If the same tile runs from the bathroom floor into the shower but the grid is offset by two inches at the shower entry, the eye catches it instantly and the whole illusion collapses. The tile layout has to be planned as a single grid across the entire floor plane, with the shower entry falling on a grout line - not through the middle of a tile. This is a layout decision made before the first tile is set, and it is the difference between a floor that looks designed and one that looks tiled.
A curb is a physical stop. Even with identical tile on both sides of it, a 4-inch curb breaks the plane and reintroduces the visual boundary you were trying to remove. A curbless shower - typically achieved with a linear drain at the entry and a recessed pan - lets the floor run through uninterrupted. It is also the single biggest accessibility upgrade you can build into a bathroom, and it costs the least when it is designed in from the start rather than retrofitted.
Use one grout color across all zones. A change in grout color is as visible as a change in tile - arguably more so, because grout is what draws the grid. Match the grout closely to the tile if you want the field to disappear into a single plane; contrast it deliberately if you want the format to read. What you should not do is match on the floor and contrast in the shower, which is the most common accidental way to break a same-tile bathroom.
Same color, different grade. Epoxy grout is stain-proof, waterproof, and requires no sealing - which makes it the strongest choice for the shower floor, where soap film and constant moisture attack the joints hardest. A high-performance polymer-modified cement grout (ANSI A118.7) is the practical residential standard and performs well throughout the rest of the bathroom. Using different grades in different zones is fine and invisible; using different colors is neither. And skip bright white in the shower - it is the fastest-discoloring choice in the wettest room in the house. Our grout color guide covers the choice in full, and our grout cleaning guide covers what to do when it happens anyway.
1. Running a polished 12×24 onto the shower floor. The most dangerous mistake on this list, and the most common. It drains fine with a linear drain and looks spectacular dry. Wet and soapy, it is a slip hazard. Specify the matte version of the same tile for the shower floor - most collections offer both.
2. Buying a wall tile for a floor because the spec sheet was silent. No PEI rating and no DCOF value is not an oversight - it is the manufacturer declining to certify the tile for a floor. Treat silence as a no.
3. Ordering two formats from different lots. The whole point of "one collection, two formats" is that the color is identical. Order the large format and the coordinating mosaic together, from the same production run, or the shower floor will read as a near-miss - which looks worse than an obvious contrast.
4. Deciding on a linear drain after the pan is built. The drain type dictates the slope, and the slope is built into the mortar bed before tile. Retrofitting a linear drain into a completed center-drain pan means demolition. Make this call at the same time you pick the tile.
5. Ignoring assembly weight on shower walls. Heavy floor tile on a vertical surface is fine - if the backer is rated for it and the mortar is non-sag. Skipping either check is how a wall of beautiful large-format porcelain develops a slow, permanent slump.
6. Treating the tile as the waterproofing. It is not, and it never was. Tile and grout are both porous. The waterproof membrane behind the tile is what keeps water out of the framing. A perfect tile job over a missing membrane is a mold problem on a timer.
Running one tile across the whole bathroom is usually the cheaper path, and for reasons that are not obvious at the showroom counter.
Volume pricing. Tile is priced in tiers. Buying 180 square feet of one product almost always beats buying 80 square feet of one and 60 of another and 40 of a third. Single-product orders are also less prone to the shortfall problem, where you run 12 square feet short of a tile that has since changed lots.
Less waste, simpler attic stock. Offcuts from one zone become usable material in another. And when a tile cracks in five years, you have one box of matching spares in the garage instead of three partial boxes that may or may not cover the failure.
Faster labor. A tile setter working in one format, with one mortar, one trowel notch, and one grout, moves faster than one who is switching products at every plane change. Labor is the larger half of most tile budgets.
Where the cost goes back up: the linear drain. It is a genuine line-item add over a standard center drain, both in the fixture and in the mortar-bed work. But it is buying you something specific - large-format tile on the shower floor, a curbless entry, and a drain that visually disappears. If continuity is the goal, it is the component that delivers it. If it is not, the two-format approach gets you 90% of the look for none of the drain cost.
Bathify does not sell tile - but the components that decide whether one tile can run everywhere are all here. The drain determines your shower floor tile size. The niche determines whether your tile layout gets interrupted. These are the parts that make the design possible.
This is the single component that makes a same-tile bathroom possible. The linear format lets the shower floor slope in one flat plane rather than a compound bowl, which removes the tile-size cap and opens large-format porcelain to the shower floor. The tile grate is the detail that finishes it: you drop a cut piece of your own floor tile straight into the drain cover, and the drain visually disappears into the field. Water enters through the narrow perimeter slot. Stainless steel channel with flange edge, adjustable installation brackets, 2" outlet, and a grate that lifts out completely for cleaning.
The same single-plane slope advantage in a longer run, sized for wider walk-in showers and wet rooms where a 27.5" channel would not span the wall. The Pixel grate is a visible, patterned stainless face rather than a tile insert - the right choice when you want the drain to read as a deliberate design line at the wall rather than vanish. Satin-polished finish, handcrafted, removable grate for cleaning, and adjustable brackets that suit most substrate builds.
Shop: Kube 47.25" Linear Drain with Pixel Grate at Bathify → · See all linear drains →
A tiled niche means cutting your field tile into the recess, mitering the returns, and hoping the grid lines up on all four edges - the fussiest part of any one-tile shower, and where most DIY layouts go wrong. A prefab stainless niche sidesteps the entire problem: the recess arrives finished, so the field tile simply meets a clean metal frame and stops. 16-gauge stainless construction with a baked finish for durability in constant moisture, and a square 12×12 format that sits cleanly on a standard tile grid.
Shop: Nicola 12"×12" Shower Niche at Bathify → · All shower niches →
One tile can go almost everywhere - the drain decides how far
If you want the simplest correct answer: buy one matte, floor-rated porcelain with a wet DCOF of 0.50 or higher. Run it on the bathroom floor and the shower walls. Use the coordinating mosaic from the same collection on the shower floor. Done - continuous, compliant, and safe.
If you want true single-format continuity: specify a linear drain with a tile-insert grate at the rough-in stage. The single-plane slope lets your large-format tile run straight through the shower floor with no size break and no visible drain. Budget for the drain and the mortar-bed work up front.
If you're working with an existing center drain: the two-format approach is your answer. Do not force large tile onto a compound slope - it will lip, it will pool, and it will look worse than the format change you were trying to avoid.
If you fell in love with a wall tile: put it on the tub surround or a single feature wall and choose a floor-rated tile for everything underfoot. This is the one direction that has no workaround.
If the bathroom is small: run the one tile everywhere and break it in exactly one place - the niche. Continuity makes the room read larger; a single accent keeps it from reading flat.
Build the Shower Your Tile Plan Needs
Linear drains with tile-insert grates, stainless shower niches, benches, and full shower systems from KubeBath, Vanity Art, and Agua Canada. Free shipping on orders over $50. Shipped across the USA.


